
By Gary Bunzer
Technical Editor
October 2018
Saggy Roof
My RV roof leaks in several places, and the roof has sagged around the air conditioner. While surveying the damage, I determined that the roof is constructed in layers, including rubber material, plywood, and foam. I think I need to replace all but the foam and some of the rafters. Can you offer advice on the best way for a do-it-yourselfer to proceed?
— Randy Avets
Harrisburg, Pennsylvania
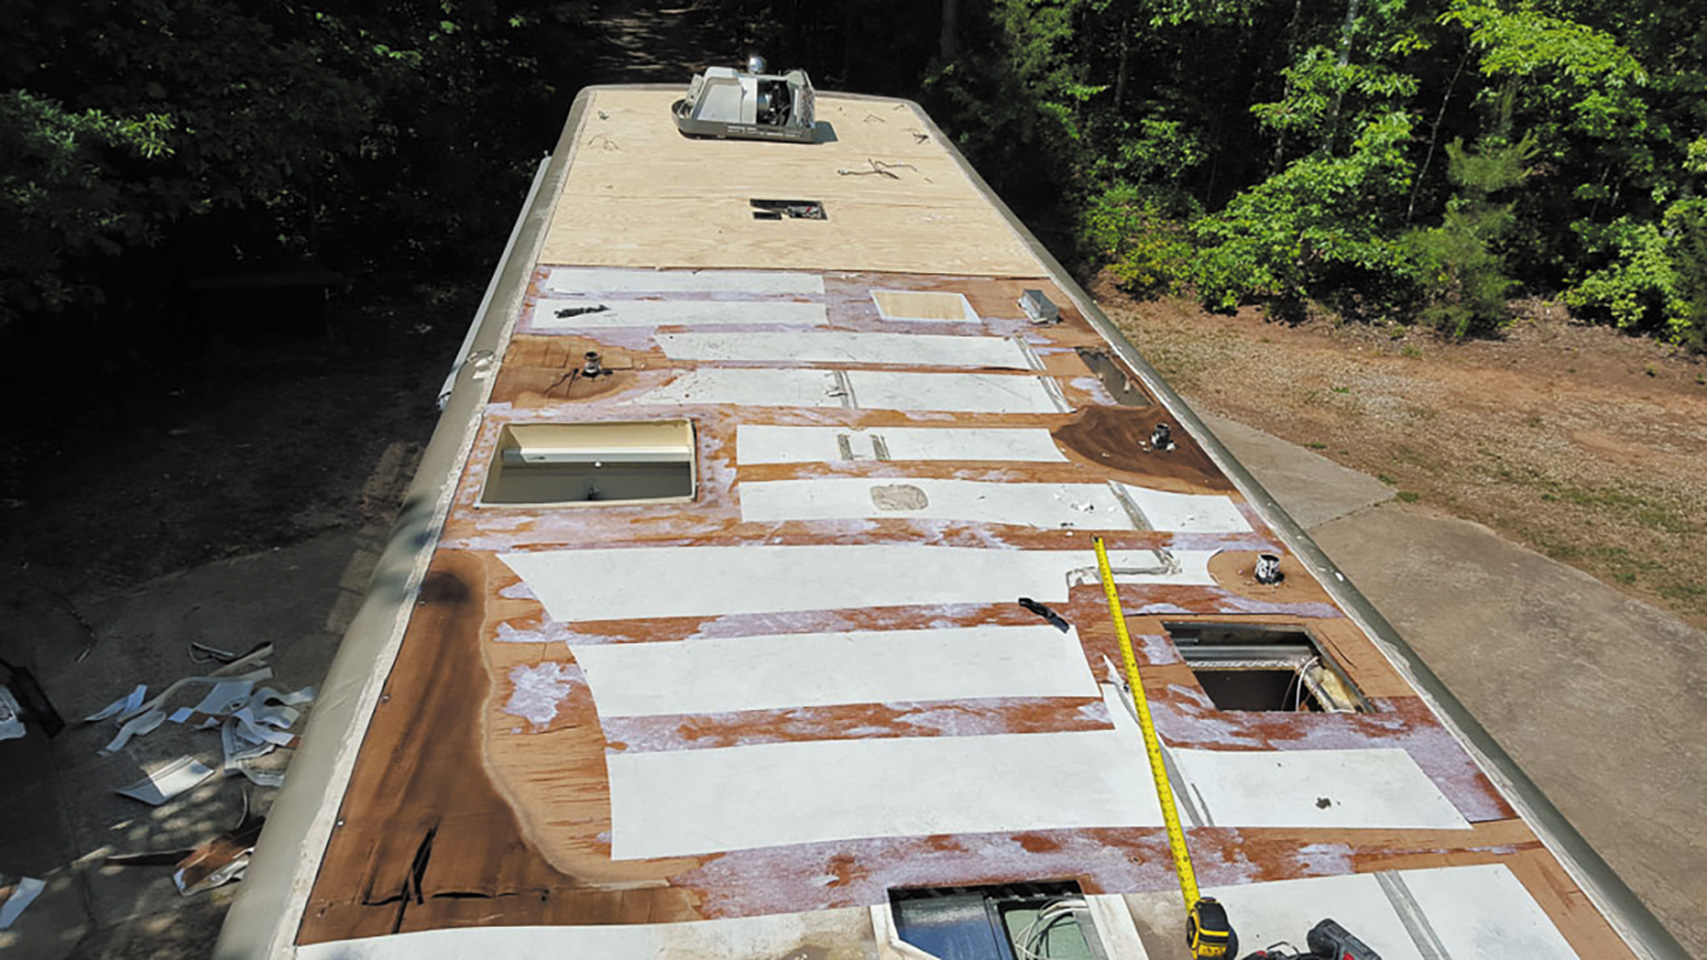
Extensive damage from water leaks usually requires a complete roof replacement, a major repair that is best left to professionals. If, however, you are quite handy with tools, can provide a covered work area, and have some spare time, it’s possible to save a lot of money by doing it yourself. But please be sure you feel comfortable taking on such a project. In addition to the craftsmanship required, working on top of an RV roof can be hazardous.
Because the roof has sagged, I’m assuming your RV has wooden structural members, not aluminum. First, remove every component from the entire roof area — the air conditioner, all vents, antenna, running lights, ladders, etc. All the side trim and drip molding, etc., also must be carefully removed.
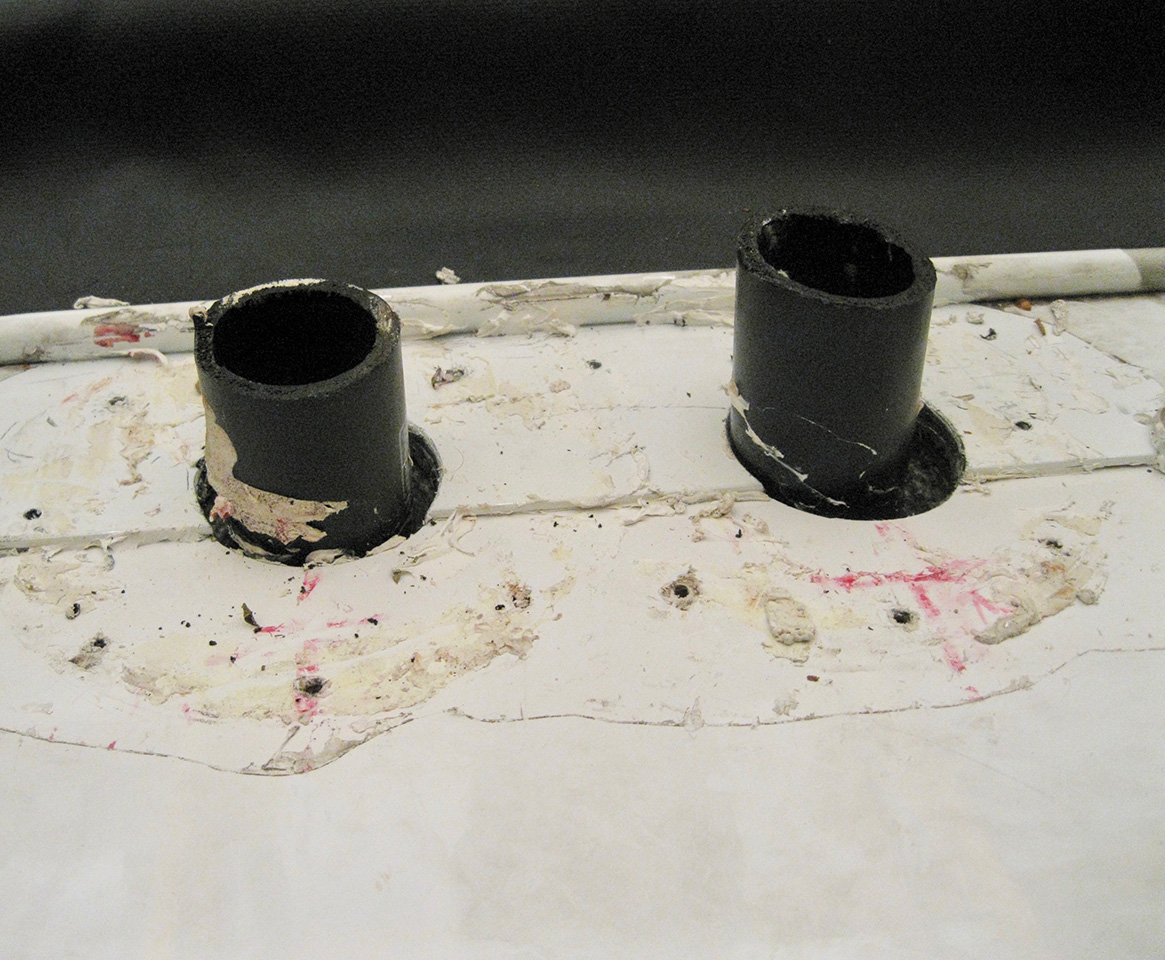
Holding tank vent pipes should protrude from the roof surface after vent caps are removed.
Typically, the rubber membrane is cemented to the plywood substrate, folded over the sides of the RV, and secured in place before the trim pieces are installed. At the front and back there may be a flat molding strip, or the membrane might simply tuck under a fiberglass cap. Remove all the rubber membrane and locate the damaged plywood decking sections. If there are many, remove them all to inspect the inside of the roof cavity. In some cases, water may have permeated the foam insulation and possibly the interior ceiling paneling. Replace all the damaged or warped wood rafters with new material. Gradually taper the rafters to the ends so that they are thicker in the center. In other words, create a slightly crowned roof. This will eliminate low areas and ensure proper water drainage, especially at that sunken air conditioner location.
Once all the new insulation and rafters are secured, cover the entire roof with new plywood. In some cases, I recommend 3/8-inch plywood, although 1/4-inch usually will suffice. Be sure no screws or staples are sticking up above the plywood. Pay close attention to the seams, and take care to make them tight between the panels. The seams must remain flush and smooth so the EPDM rubber will not tear or crease during installation. A thin overlay can be installed at each seam. Bevel the edges of the plywood slightly at the sides of the roof.
If you use bonding-type cement, it must be applied to the bottom ply of the EPDM as well as to the plywood substrate. But if water-based adhesive or pressure-sensitive cement is used, it is applied only to the plywood. Purchase enough EPDM rubber so that it can be rolled out the entire length of the RV. It also should extend far enough over the sides of the RV that it folds down behind the drip molding or awning rail.
Fold back the membrane, front to rear, about halfway, and then apply the cement by brush, roller, or spray gun. Roll out all air pockets from the centerline of the coach to the sides with a lightweight roller or a push-type broom. At the RV sides, fold the material over the edge of the roof and staple it to the sidewall on top of the siding material. Trim away any excess with scissors. Apply butyl tape to the back of the drip channel or awning rail before reinstalling it to the sides of the RV.
After the roof is completely cemented in place and secured around the perimeter, use scissors to cut all the openings for the sewer vents, the refrigerator vent, the 14-inch vents, the roof air conditioner opening, etc. When cutting the openings, always radius the corners to eliminate the possibility of the EPDM tearing. If possible, fold excess rubber into the opening and staple it to the sides of the opening. Apply butyl tape and install the vents as usual, sealing all screws, flanges, and edges with the appropriate lap sealant. When working with EPDM rubber and lap sealant, do not smooth out the bead of sealant after applying it. Above all, take your time.
Slow-Draining Tub
I have a 1985 travel trailer. The bathtub will not drain properly until I open the sewer valve on the outside of the trailer. Does that mean I may have a vacuum problem with the air vent?
— John Spanner
Topeka, Kansas
Chances are, the vent piping has fallen into the tank below the surface of the liquid in that tank. With no place for the air to escape, the tub has a difficult time draining. Air enters when you open the termination valve, which aids in draining the tub. Unfortunately, it usually is necessary to drop the tank to properly affix the vent pipe to the top of the tank, so this may be a task for a pro.
But first, to be sure the vent piping has fallen inside the tank, remove the vent cap on the roof for that tank. If the ABS vent pipe is not sticking up above the roofline about two inches, then it likely has fallen into the tank.
If you want to tackle this project yourself, following is an overview of how it’s done.
*Drain and flush both holding tanks.
*Inside the bathroom, remove the access panel at the tub and disconnect the P trap and the upper portion of the drain line.
*Locate the suspect vent pipe inside a closet or lavatory cabinet.
*Use a hacksaw to cut the vent pipe as close to the floor as possible.
*Access the holding tanks and disconnect the termination assembly so that the gray-water tank can be dropped straight down.
*Use a flashlight and a mirror to view the top of the tank from under the chassis and look for any other drains or vents that may enter the top of that tank. All drainpipes must be cut as close to the floor as possible.
*Remove any electrical wires attached to probes that connect the monitor panel to the tank. Be sure to mark the exact location for any such wires and note their respective colors.
*Determine how the tank is secured to the underside of the RV. Look over the installation carefully to ascertain the method used.
*Support the tank with a floor jack, remove all the supporting hardware, and carefully lower the tank to the ground.
*If the existing fitting for the vent pipe is damaged, or if a rubber grommet fitting has been used, install a new fitting, which allows you to insert the vent tube into the fitting while preventing further movement down into the tank.
*Reinstall all components and the tank in the reverse order and insert a length of ABS pipe into the new vent fitting on top of the tank. You can use a full-length section or use two shorter pieces and connect them with an ABS coupler in a convenient location under a cabinet or inside a closet.
*Fill the tank completely with fresh water to test for leaks anywhere in the system.
*Don’t forget to reinstall and seal the vent cap up on the roof.
Battery Bank Not Charging
I am a true RV beginner with a Type C motorhome. Although I’ve tried to become knowledgeable about my vehicle, deep-cycle batteries have never been too friendly with me. While I’m at a campsite and connected to regular 30-amp shore power for three or four days, all appliances, lights, etc., work great. When I get home to clean the unit without an AC hookup, everything is dead. I can’t start my generator, and the monitors and lights don’t work. Battery fluids are at proper levels. All circuit breakers (that I can find) are okay and have not tripped.
My unit has a converter. At home, attempts to charge the batteries with the adapter for the shoreline connection have been unsuccessful. Only after the engine is running for about five minutes can I get power and start the generator. With the engine on, everything works great. When I rely only on my batteries (no shoreline or generator power source), DC power is dead.
This motorhome is new. What’s wrong? How good is the built-in converter for charging the batteries? Do I need to purchase a separate multistage battery charger? If so, what brand do you recommend?
— Mike Martez
Philipsburg, Pennsylvania
Welcome to the RVing experience! It sounds like a relay inside the converter/charger might not be opening or closing (depending on the brand), thereby prohibiting the charge circuit from reaching the battery bank.
But the first step is to analyze the battery itself. Badly sulfated batteries simply will not hold a charge. All batteries self-discharge, but sulfated plates quicken the rate. Find a battery shop in your area that has a carbon-pile battery load tester. Even with a newer battery, this test will provide insight into its exact internal condition. Chances are your battery has not had a chance to become fully charged. Some RVs are notorious for employing mediocre or even inadequate charging systems.
Tests also should be performed on the battery circuits to determine whether any substantial drains exist. Some small, parasitic drains are normal, but when current loss approaches 700 to 800 milliamps, something needs to be rectified. Obviously, a larger drain on a battery is even worse. Any professional technician can perform this test for you, but if you have a quality digital multimeter (DMM), you can do it yourself. This YouTube video shows how to do the test on a car, but it’s essentially the same process for any vehicle: https://youtu.be/KF1gijj03_0.
The good news is that if you determine that the engine alternator and/or the charging converter do not adequately provide a complete charge, aftermarket alternators and chargers are available that extend the electrical life in the batteries. All serious RVers should consider upgrading to better batteries, sophisticated three-step chargers, and high-output automotive alternators. Electrical woes will be minimized and, with proper usage, perhaps completely eliminated.
I’ve witnessed good results from the multistep chargers produced by Xantrex (TrueCharge 2). In your case, likely the least expensive option would be to use the Xantrex battery charger as an add-on to your stock converter, allowing the existing converter to still be the “converter,” and utilizing the Xantrex unit as a battery charger only.
Another option is to consider replacing the stock converter with a higher-output unit from Parallax Power, or switching to an inverter/charger instead of a converter.
Managing 12-volt battery systems has become one of the most important challenges RVers face today. If a stuck or faulty relay is discovered in your existing converter, now might be the time to upgrade. Otherwise, any certified service technician probably can replace or repair your converter, thereby leaving everything stock.