
Google Photos does the work of organizing, finding, and sharing your original images.
By Chris Guld, F349932
June 2020
Ever hear this saying? “I will always choose a lazy person to do a difficult job, because a lazy person will find the quickest and easiest way to do it.”
I am that lazy person, and I have found a fast and easy way to organize my many thousands of photos:
*Take photos with a smartphone so they automatically can be uploaded to the cloud.
*Use Google Photos to store my entire photo library in the cloud, including past photos from cameras and prints or slides.
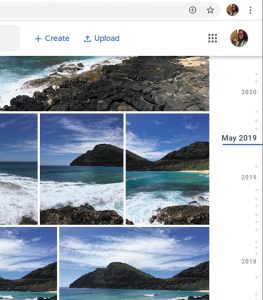
Google Photos sorts photographs automatically by date, providing an easy way to scroll down and see photos taken at a certain time.
Organize By Date
My web-based or “cloud-based” photo library is arranged automatically by date. This requires no work on my part. Every digital photo includes the date it was taken, which Google Photos uses to sort your photo library. The most recent photos are at the top, so as I scroll down, I go back in time. What if I want to see photos from four years ago? Using the timeline that appears on the right side of the screen, I can grab the marker and drag it to the year and month I want in no time.
I remember that we took a trip to Cuba in December 2015. By scrolling down to that date, I can easily see all of the photos from that trip. Google Photos has already done the organizing for me.

All photos shot in a particular place, regardless of when they were taken, can be located by searching for the site by name.
Search For Photos
If I don’t remember when we traveled to Cuba, I can search for it by name and find my photos that way. Or, say I want to see all the photos I’ve taken at Mount Rushmore, which involved three visits in three years. I merely search with the words “Mount Rushmore.” I’ll be able to view all of those photos as a group. In either case, I did not have to tag or name my photos, because Google uses machine learning and GPS to figure out what I want.
The app also detects faces automatically and groups photos together. Say I want to see all the photos of my husband, Jim. I just view the people albums, find Jim’s face, and click to see all of them.
Delete Photos
Sometimes I accidentally snap the shutter on my phone’s camera. I have pictures of my foot, and of the inside of my pocket. With the Google Photos app on my phone, those photos are automatically uploaded to the cloud along with the rest. Now I have two copies of my foot! Using Google Photos’ trash can icon, I select the photo that is garbage, tap the trash can, and Google deletes it from both my phone and cloud.
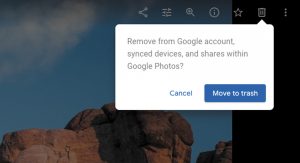
An unwanted image can be removed from both phone and cloud storage by selecting it and using Google Photos’ trash can icon.
What about the pictures that are unnecessary, but not garbage? When we were in New Zealand, we spent a delightful day at the Hobbiton Movie Set, where the Lord Of The Rings and The Hobbit trilogies were filmed. If you looked at all of those photos, you would see that many are similar. I always take two or three shots for good measure — my number-one rule for photo taking. That way, I’m bound to catch some good ones! I do not delete multiples, because Google Photos provides free, unlimited storage. You can create albums to separate the wheat from the chaff.
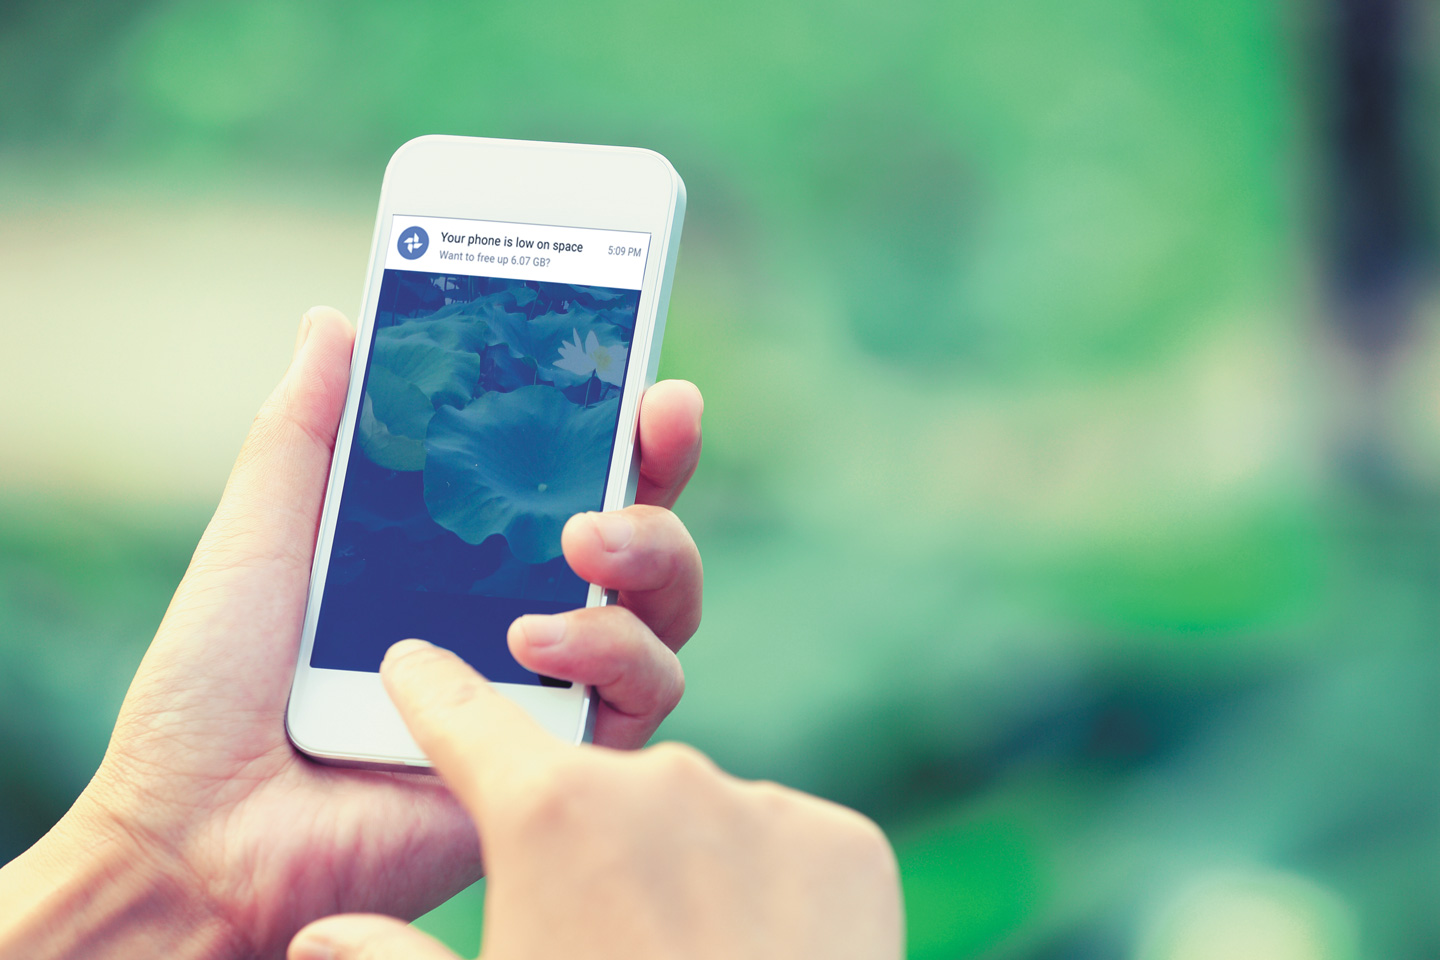
Free Up Space
When your phone gets full, it may be time to use the Google Photos “Free Up Space” command. Once your photos are successfully backed up to the cloud, they will be deleted from your phone.
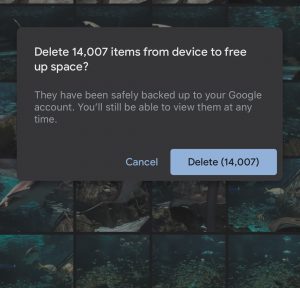
Using the “Free Up Space” command, users can delete photos stored on their phone once they are safely backed up in the cloud.
Before using this command, I recommend that you copy your photos to another cloud storage service, such as OneDrive, Dropbox, or Amazon. Then, if you should accidentally delete images from your Google Photos, you’ll still have your OneDrive/Dropbox/Amazon copy.
Make Albums And Share
The traditional method of organizing photos says, “Keep the best and delete the rest.” Oh, no! I am much too lazy for that. Deciding which ones to delete would be torture, but I am capable of picking the best, or at least a good selection. So, instead I say, “Highlight the best while keeping the rest.”
I know people who return from an epic two-month trip saying they now need a month to sort all their photos. Not me. Before we embarked on our RV trip to New Zealand and Australia, I used Google Photos to create an album.
Every day as we took photos on the trip, I picked the best five to seven and added them to the album. Google Photos provided a link to that live album that I could share with friends. They didn’t need to use Google Photos to see my pictures; they just clicked the link using a smartphone or a computer. About 65 people followed us throughout our five-week journey. They could choose whether to be notified when we added new photos, and they could even comment on them. When we returned home, the sorting already was done. And the process was fun.

Users can access all the images that have been taken of an individual or a pet, as Google Photos organizes them automatically.
In total, we took nearly 3,000 photos during that trip, all with our iPhone, Google Pixel, and Samsung phones. Whenever we had Wi-Fi, the images were uploaded to our Google Photos accounts. The album we shared has only 313 pictures — much more manageable.
Once you have created an album, you can do many other things with it:
- Add text blocks and maps to make the album more like a blog
- Play slideshows on your TV using Chromecast and Google Home
- Make a photo book
- Download the album to your computer to have a local copy of your best photos
At home our TV is on almost all the time, even though we don’t watch many shows. It stays on the HDMI/Chromecast setting and cycles through the photos in our favorite albums. It’s like a screensaver on a computer. I just love being reminded of our wonderful travels.
A New Start
Google Photos has surpassed 1 billion users. I suspect that many of them, like me, appreciate not having to think about how to organize their photos; they surrender to Google. But others have worked hard at their own methods of organizing photos. Perhaps they won’t like the program, because it takes their organizational structure away. It’s a personal choice.
I’ve changed my own method for storing, organizing, and sharing photos. I used to take all my photos with a digital camera. Every photo was downloaded onto my computer. To see my entire library of photos, I’d need my computer. Then, I would select the best photos — the ones I wanted to share — and put them online.
Now I take most of my photos with my phone. That way, they’re automatically uploaded to the web. To view my entire photo library, all I need is a device connected to the internet, and my username and password. I don’t need my computer, but I can use it if I want, as long as I have an internet connection.
Google Photos represents a totally different way to manage our images. It frees us to take as many photos as our hearts desire with our amazing smartphone cameras.
GOOGLE PHOTOS EXTRAS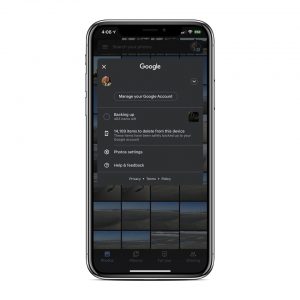
Google Photos is a free app and comes preinstalled on many newer smartphones. If not, iPhone users can get it from the App Store; Android owners can download it from the Google Play Store. When you’re ready to open it, it will want to know a few things:
Your Google Account (an email address usually ending in @gmail.com) and password.
Upload size. Choose between High Quality or Original size. High Quality is the default, and our recommendation. Google will compress your photo files while maintaining as high a quality as possible.
Cellular data backup. The default setting while uploading is to use Wi-Fi, not your phone’s mobile data. Your photos will upload only when your phone is connected to the internet, either via Wi-Fi or your phone’s mobile data plan. If you have an unlimited data plan with your phone, you could keep the mobile data setting on, but to be safe, it’s best to make sure your phone is set to Wi-Fi only to avoid being charged for exceeding your data limits.
The app will upload all the photos from your phone. If you’re connected to Wi-Fi, it will begin uploading all of them to your Google account cloud storage. You can view its progress by opening the Google Photos app and tapping the account button in the top right. You will either see “Backup Complete” or a number that indicates how many photos are waiting to get backed up (uploaded). The number will decrease as more photos are uploaded. For more detail, tap on the number.
To see the photos that have been uploaded, use a computer and go to www.photos.google.com. If you are logged in with the same Google account used by your phone, you will see all the images that have been uploaded to your account.
If you have hundreds or thousands of photos, uploading could take some time, especially if you have a slow internet connection. Eventually you will see a message: “Backup Complete.”
Chris Guld is president and teacher-in-chief at GeeksOnTour.com. She and her husband, Jim, have presented seminars at FMCA international conventions and other events and venues across the United States. Chris is recognized as a Google Photos Platinum Product Expert. Her book, Mrs. Geek’s Guide to Google Photos, is available on Amazon.com.