
Having a general understanding of RV 12-volt-DC systems can help to prevent or troubleshoot issues while traveling.
By Steve Froese, F276276
May 2023
This month, I will provide a basic primer focused on RV 12-volt electrical systems. Every RV on the market incorporates 12-volt-DC electrical systems, and they are fundamental to the operation of the RV. Gaining an understanding of 12 volts DC in your RV can help avoid a failure in the future or get you back on the road faster and cheaper if a problem does occur.
RVs have two distinct 12-volt systems, commonly referred to as the “chassis” and “house” systems. They vary slightly, depending on whether you have a towable or a motorized RV. Let’s start by examining the source of all 12-volt-DC energy: the batteries. Discussing RV battery types is outside the scope of this article, but if you are interested in learning more, Family RVing has published information about this subject in the past, including my April 2019 article (“RV Battery Types”).
Batteries store electrical energy, but they do not produce it. Therefore, batteries are fundamentally important when it comes to delivering stored electrical energy to your RV. The RV may incorporate an alternator, generator, or solar power to produce electricity, but, unlike batteries, these devices can’t store it.
Let’s start by discussing towable RVs. Your travel trailer may incorporate a single battery or multiple batteries, and these may have a 6-volt or a 12-volt configuration. A single 12-volt battery is the simplest configuration possible, but it is more common to see multiple batteries connected to increase available energy.
In the case of a motorhome, you will have at least two separate battery banks — one for the engine and chassis functions (engine starting; chassis electrical; exterior running, brake, and tail lights, etc.), and one for the RV house systems. In the
case of a towable RV, the towing vehicle’s battery acts as the “chassis” battery, and the RV battery bank provides the “house” power.
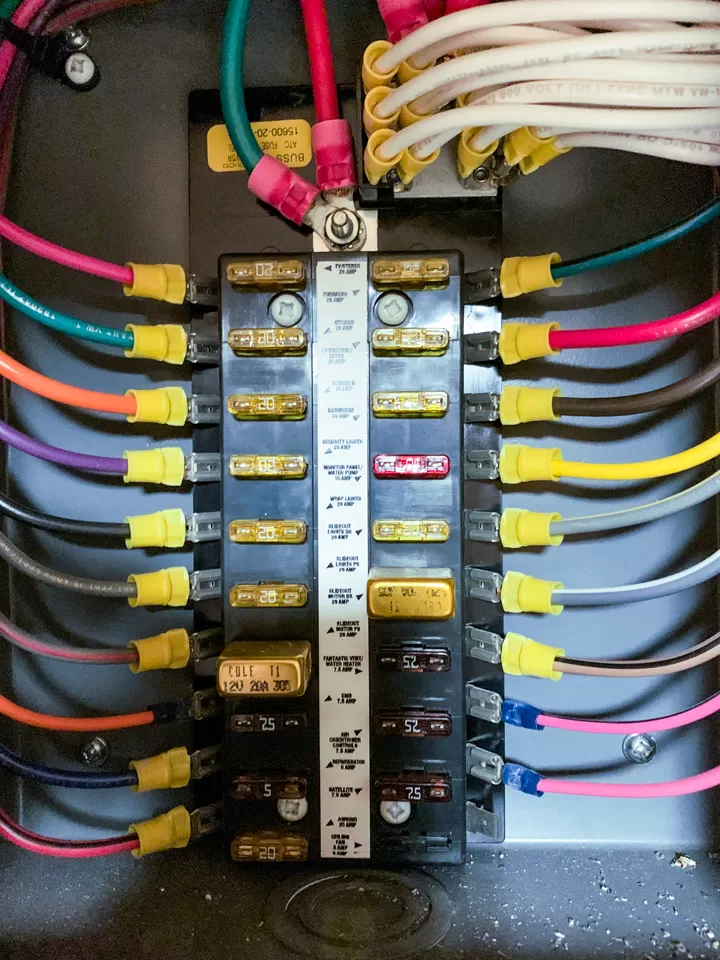
Don’t wait until a problem occurs to locate the fuse panel for your RV’s house power system.
These two systems (house and chassis) are electronically isolated from each other unless a charging source is present (such as an alternator or a generator). In that case, the two systems are connected so all batteries in both banks can be charged. In modern motorhomes, this usually is achieved through the combination of a mechanical solenoid and a solenoid controller. For travel trailers, the battery isolation depends on how the towing vehicle is wired. In many cases with modern vehicles, the tow package is factory installed or prepped so the battery banks are connected only when the engine is running, but the trailer wiring may be much simpler and not ignition protected.
Understanding how your trailer’s tow vehicle is wired is key to ensuring you won’t be stuck with a dead engine battery. If you are not certain about this, have the wiring checked, but you also can make sure your trailer’s seven-way wiring harness is disconnected when you are not in the process of towing the trailer.
For motorhomes, the solenoid control senses the voltage level for each battery and closes the solenoid if either battery has sufficient voltage, usually around 12.8 volts DC. This would be the case if the batteries were being charged by the alternator, generator, or solar panels. Once the voltage level of either battery drops below this level, the solenoid will open to isolate
each battery bank. This would be indicative of an external power source being removed. While the solid-state control system takes care of deciding when to open or close the solenoid, the mechanical solenoid itself may fail over time or due to damage. If your batteries experience a discharge condition when they should be charging, seek out professional assistance. Your battery isolation system may be the culprit.
The chassis 12-volt system is responsible for powering the exterior running lights on your RV. In the case of a travel trailer, this signal comes directly through the seven-way trailer harness and feeds the light circuits. The exterior light circuits (as well as the trailer brakes) are completely isolated from the house 12-volt wiring system.
The exterior RV lights should be checked prior to driving day. Any lights that aren’t functioning must be repaired immediately. A faulty ground connection is often to blame for non-working lights. I suggest carrying extra bulbs for all lights.
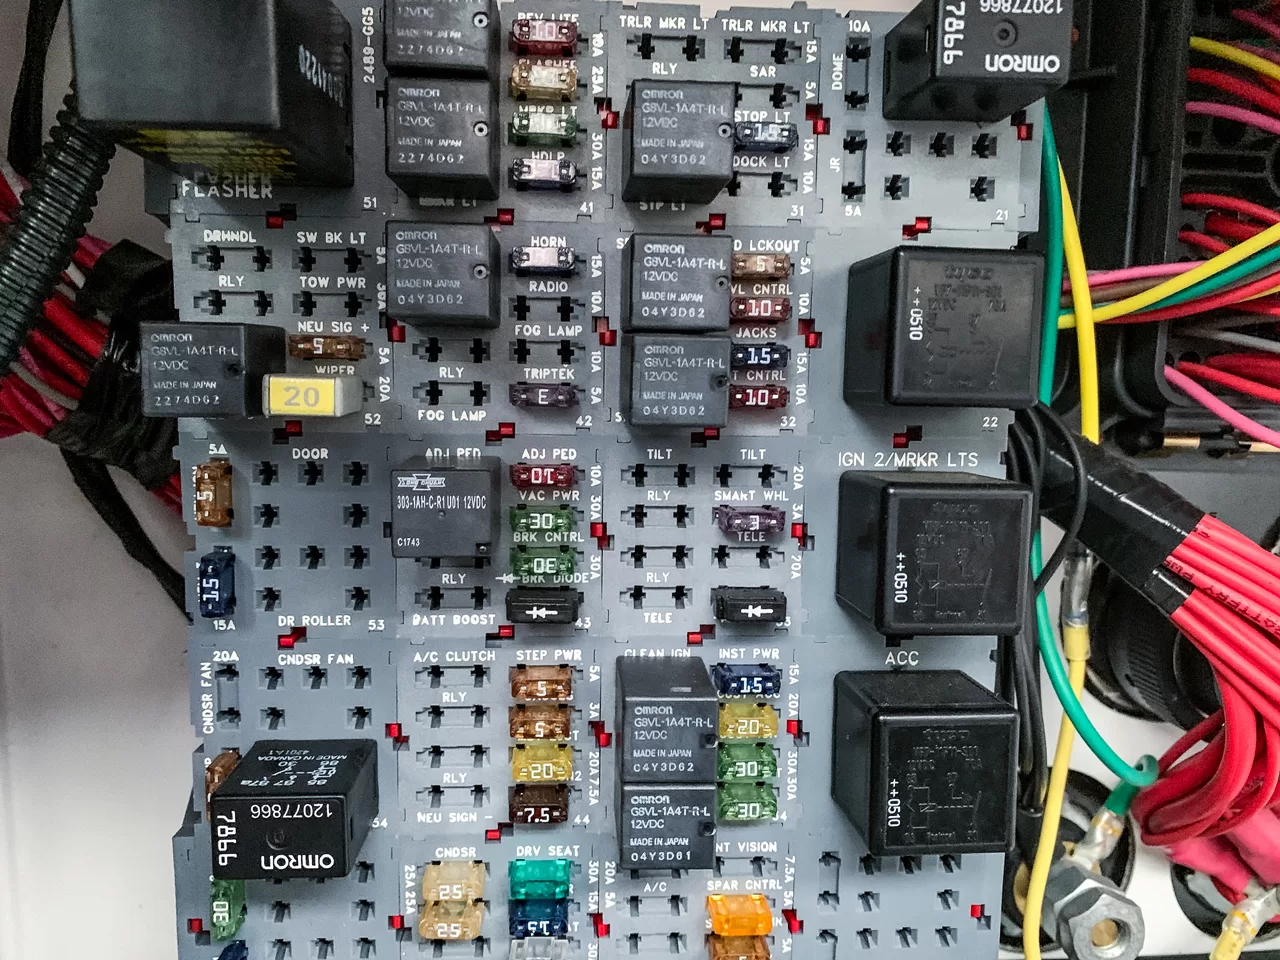
The point here is that while all other 12-volt systems inside an RV are distributed from the house battery and fuse panel, the exterior lights are the exception. They are part of the chassis wiring and fuses.
Power for the rest of the onboard low-voltage electrical systems, including lights, water pump, furnace, water heater, and fridge control boards, as well as the monitor panel, comes from the house battery bank. You may have other loads in your RV. Each load, or set of loads, requires its own dedicated and protected circuit, so the large battery cables will feed a distribution panel (which may be incorporated into the converter). This panel will consist of a series of fuses that protect each branch circuit. It is important to note the location of the RV’s fuse panel, so you know where to look if a 12-volt load stops working.
If you find that you have a blown fuse, replace the fuse. But if the fuse continues to blow, you should investigate further, as something is likely wrong with the load or wiring. Never replace a fuse with one that has a higher current rating. Something that many RVers neglect to do is carry extra fuses that fit your RV (both engine and house) in all current ratings matching those that your RV uses, such as 5A, 7.5A, 10A, 15A, 20A, 30A, and 40A.
Unless your entire RV loses 12-volt power, focus on individual branch circuits when troubleshooting a circuit failure. Complete loss of power can be attributed to only a few things, including loose or damaged battery cables, a battery storage switch that is turned off, battery discharge, a main battery fuse (usually 30- or 40-amp fuses located in the converter fuse area), battery failure, or the like.
To allow for battery charging, every RV has a shore power cord, and some RVs have generators and/or solar panels. Solar panels often are wired to the battery terminals, so they are not directly part of the house wiring network. A vehicle alternator also
is used to charge both RV battery banks, and it does so by having the aforementioned isolation solenoid close, allowing current from the alternator to charge the batteries.
Shore power is used both to charge the RV batteries and to provide 12-volt power to the RV instead of the batteries. The detail of this will be covered in my future 120-volt-AC RV primer. Suffice it to say that, similar to how the vehicle alternator charges the batteries, the RV converter or inverter/charger changes 120-volt shore power or generator power to 12 volts DC. It energizes the 12-volt system and charges the batteries.
So, there are a few important takeaways from this article. The first is that separate 12-volt power systems exist for the chassis and the house RV systems. The exterior running, clearance, marker, signal, brake, and tail lights are part of the chassis 12-volt system. Both the chassis and the house battery banks should charge whenever the vehicle is running, or if the shore power/generator is operating. The house battery bank power is distributed through a fuse panel to feed individual branch circuits. At its core, the 12-volt-DC system is not complicated if we treat it as a separate entity from the 120-volt system. Troubleshooting simple problems with your 12-volt system, such as a failed light or component, is usually straightforward, and the issue often can be traced to a blown bulb or fuse. It is important, though, to check the system more thoroughly if a fuse blows more than once.
While this month’s article offers an extremely high-level look at the subject, my hope is that it provides some insight into how the 12-volt RV system functions.
Send your troubleshooting questions to Steve Froese at techtalk@fmca.com. The volume of correspondence may preclude personal replies. Not all responses will apply in every instance. Some situations may require a visual inspection and hands-on testing. If you choose to follow any procedures outlined in this column, first satisfy yourself that neither personal nor product safety will be jeopardized. If you feel uncomfortable about a procedure, stop and make an appointment with an RV service facility.
You may also want to consult the FMCA Forums (https://community.fmca.com) to see whether your question has already been addressed or, if not, to post it.