
Now that you have your new home on wheels, what additional gear do you need to have on board?
By Chris Dougherty, F263059
June 2024
Buying a new RV is exciting, especially if it’s your first. But, like buying a home, it’s only the first purchase of many. An RV comes with furniture, but it still needs other equipment and accessories. Some items, while not required, make a sizable difference in the comfort and convenience of RV travel.
The nice thing is that many accessories we buy can move with us from one RV to the next. Some require permanent installation, but, as a result, this may increase the resale value of the unit.
Here’s a list of various tech accessories you should consider after buying a new RV. I don’t delve into lifestyle-type accessories here — just the ones you need for the RV’s operation, broken down into key categories.
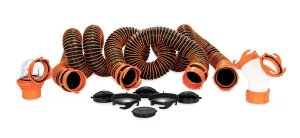
Heavy-Duty Sewer Hose
SEWAGE HANDLING
Arguably among the most unpleasant facets of RVing, the mere thought of sewage handling can elicit a feeling of dread for some. I learned early on that money spent on high-quality hoses and equipment is very well spent.

Sewer Hose Elbow Adapter
While dumping the holding tanks is never fun, with the right equipment it can be a clean and harmless chore. A kit with a heavy-duty sewer hose and fittings is essential. Inexpensive sewer hoses tend to spring leaks, and cheap connectors may not be dependable, leading to a sizable spill. The high-quality kits have hoses that are scuff resistant and less prone to cold-related damage. The connector will have four lugs instead of two, along with replaceable seals and a threaded fitting for the dump station connection. Many fittings are available, including wyes, storage brackets, and more.
RV owners should carry enough matching hoses in different lengths to reach far-flung campsite sewer connections. A clear straight or elbow fitting (union) is highly recommended to enable you to see what is coming out of your tanks so that you can continue to flush until they are clean.
A separate utility/garden hose is recommended for the process of cleaning up your sewer kit or using with your black-tank flush. This should not be a drinking water hose but a different color to avoid confusion. The water supply at dump stations may use reclaimed water, and a dump station is pretty filthy anyway.
Also, don’t forget your consumables: heavy-duty disposable mechanic’s gloves to wear while dumping (available at Harbor Freight and other stores), toilet chemicals, and RV/marine toilet paper.
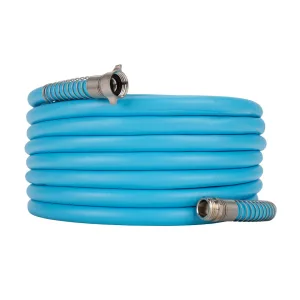
Drinking Water Hose
FRESH WATER
Connecting to a freshwater spigot is essential for RVs equipped with a freshwater system, whether to supply pressurized city water or to fill the freshwater tank. For this purpose, drinking-water-safe (potable water) hoses must be used. Ordinary garden hoses tend to leach hazardous chemicals. Have plenty of hose with you to reach the RV from a remote water connection. Some campgrounds share water connections between two or more sites, and fairgrounds and other venues may have even trickier setups.
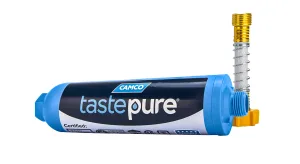
RV Water Filter & Flexible Hose Protector
I recommend that RV owners carry a shorter-length hose (25 feet) or two and a long hose (50 feet), depending on the size of the RV.
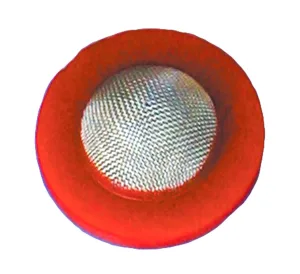
Hose Washer With Screen
Any water introduced into an RV should be filtered first. An inline disposable filter is the minimum you should use. Foreign material is common in water systems, especially campground wells, and this material can cause lots of things to grow in your RV water system, or even plug it up with sand and other debris.

Water Pressure Reducer/Regulator
Screen washers — hose washers with fine mesh added — are used for the city water inlet, and I recommend you keep a couple in the RV in case one gets lost. Spray and shut-off nozzles are also a good idea to have aboard, as well as a gravity-fill nozzle if your RV is equipped with this type of fill system.
Lastly, a water pressure reducer/regulator is an essential addition. I prefer the adjustable type that can be set to have slightly higher pressure than the basic models. With the super-high pressure encountered in some RV parks, the plastic fixtures and parts in some RVs can fail, potentially leading to severe water damage.
ELECTRICAL
Electricity confounds many RVers who have yet to be trained in how it works. Your RV’s 120-volt alternating current (AC) system will likely have a 30-amp or 50-amp service. You should invest in an extension cord that matches your RV’s amp rating, as well as adapters to connect to lower-amp receptacles if needed. If you have a 50-amp service, you will want a 50-to-30 adapter and a 30-to-15 adapter. These are sometimes called “dog bone” adapters.

Dogbone Power Adapter
At a minimum, you should add a surge suppressor/protector if your RV isn’t equipped with one from the factory. Spikes from lightning or issues with the electrical grid aren’t uncommon — not to mention electrical surges caused by miswired campground pedestals — and can lead to extensive damage to an RV.
An energy management system, or EMS, offers even better protection. An EMS unit not only has a surge suppressor but also monitors the power coming into your RV and will cut power if a fault occurs. The EMS you choose must match the service in your RV, either 50-amp or 30-amp. Some models are portable and plug in at the pedestal, but built-in types are also available.
Consider a coax surge suppressor if you use a portable satellite dish or park cable. These can be found online and reduce damage from a spike that comes through the coax.
This list would only be complete by suggesting alternate power sources for use off the grid. This could involve adding an auxiliary generator, for instance. Today, many RVs are equipped from the factory with solar, inverters, and/or lithium batteries. Still, these systems can be augmented or installed in the aftermarket to make boondocking more comfortable and convenient.
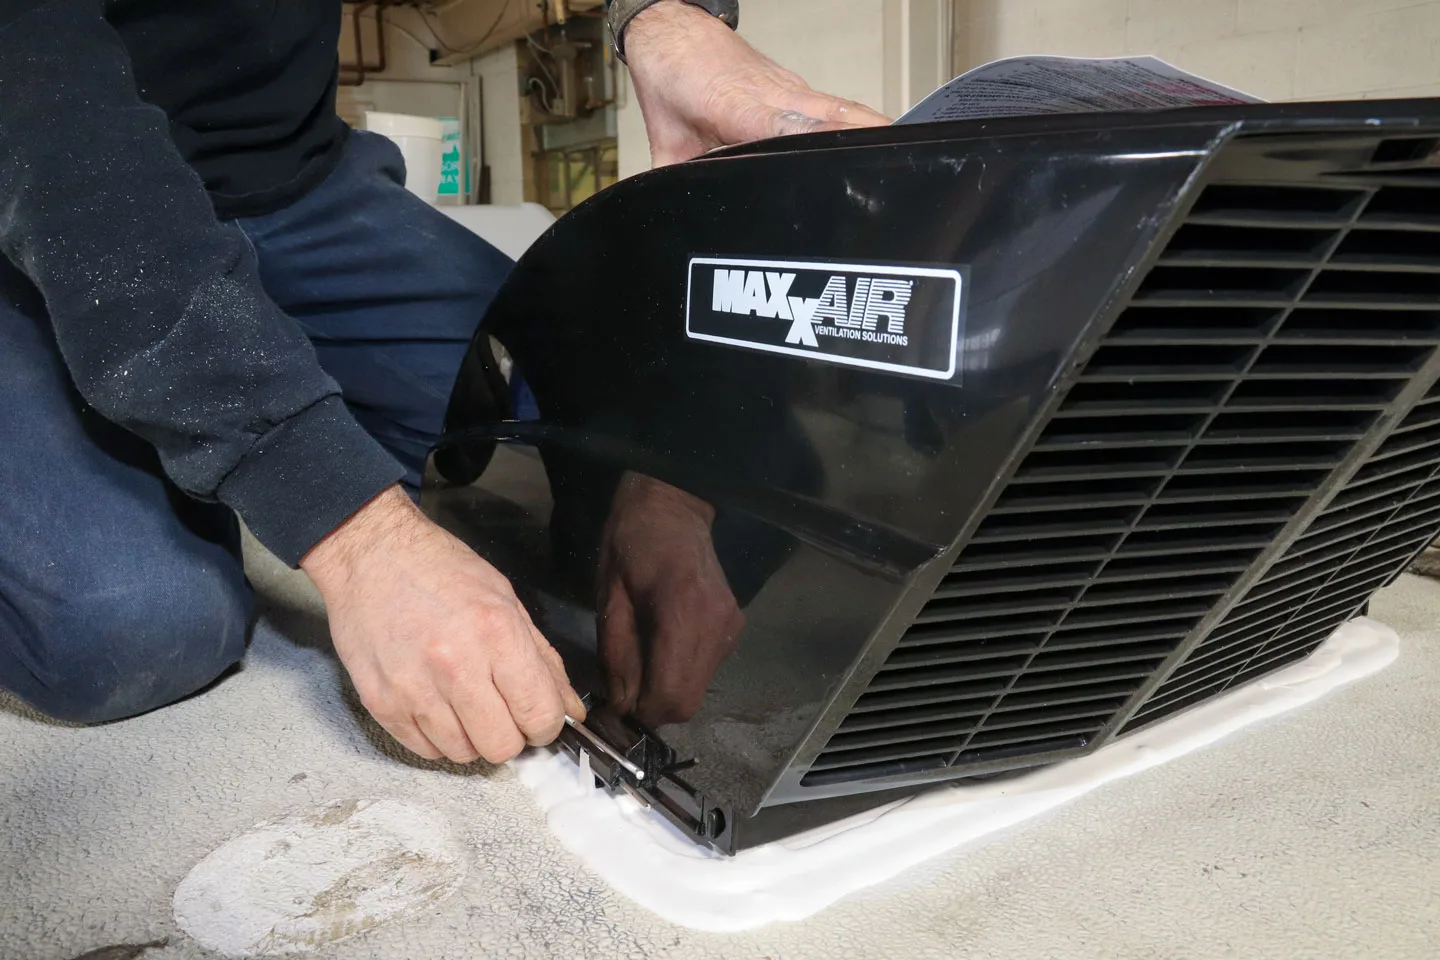
MISCELLANEOUS ACCESSORIES
Airflow in an RV is essential for comfort and to prevent condensation issues. Rooftop vent covers, like those from Maxxair, allow you to keep your ceiling vents open all the time, even in the rain. In addition, if your RV doesn’t have at least one high-volume vent fan, consider installing one. They can make for wonderful nighttime breezes in the RV and help keep it cool.
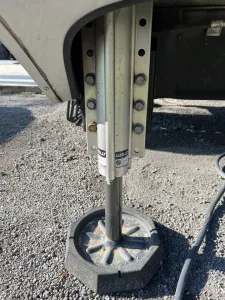
Buy plastic pads or leveling blocks to place under leveling jacks, or opt for permanently installed SnapPads, shown here.
If your RV has electric or hydraulic levelers, you may want pads for them. Many folks use wood, which holds bugs and moisture and is heavy. Plastic pads, leveling blocks, or the new SnapPads are good choices.
If your RV has stabilizers, note that they are not intended to be used for leveling the RV. You’ll want to handle that by driving onto leveling devices. Plastic leveling blocks and ramps are ideal; then, you can lower your stabilizers to take the bounce out of the RV’s suspension. Also, if you have a travel trailer, wheel chocks are an important safety device. For added comfort in an RV with more than one axle, consider an X-shaped wheel stabilizing device such as the X-Chock brand.
Tire safety is essential. Tire failures cause a lot of damage and can result in accidents. A tire pressure monitoring system, or TPMS, is a critical investment to ensure your tires are correctly inflated and to alert you to problems in real time.
Last but certainly not least are slideout toppers. I am a big proponent of slide toppers, and if your RV doesn’t have factory-installed toppers, I urge you to add them when you buy the RV. Slide toppers do several things. First, they keep detritus off the top of the slideout room roof. This is essential for two reasons: the roof and the wiper seals. Debris that collects on the roof can hold water, which can seep through the seals and cause leaks and rot. If the rooms are retracted with debris on the roof, the seals can be damaged, resulting in leaks, and they won’t be able to wipe the water off the roof. All of that ends up inside your RV. If the branches and leaves are big enough, the room won’t seal closed, and this can lead to significant water damage.
Second, slide toppers act as shade and an air barrier for slideout room roofs. The roofs of slideout rooms may not be as thick as the main roof of the RV and thus might have less insulation. As a result, more heat transfer can occur. A slideout topper can keep you cooler in summer, as well as warmer in winter because it prevents snow and ice from melting on the slide room roof. Snow and ice can also lead to ice jams and leaks. In frigid conditions, a piece of foam insulation board can be added between the topper and the roof to improve insulation and help keep the slideout topper from sagging due to heavy snow. Once it’s cleaned off, the slideout will operate as expected.
Of course, there are even more accessories and modifications you can make to your new RV to make it . . . well, yours! But the items listed here are recommended for keeping your home on wheels operating smoothly in various situations and making RV life more enjoyable.