
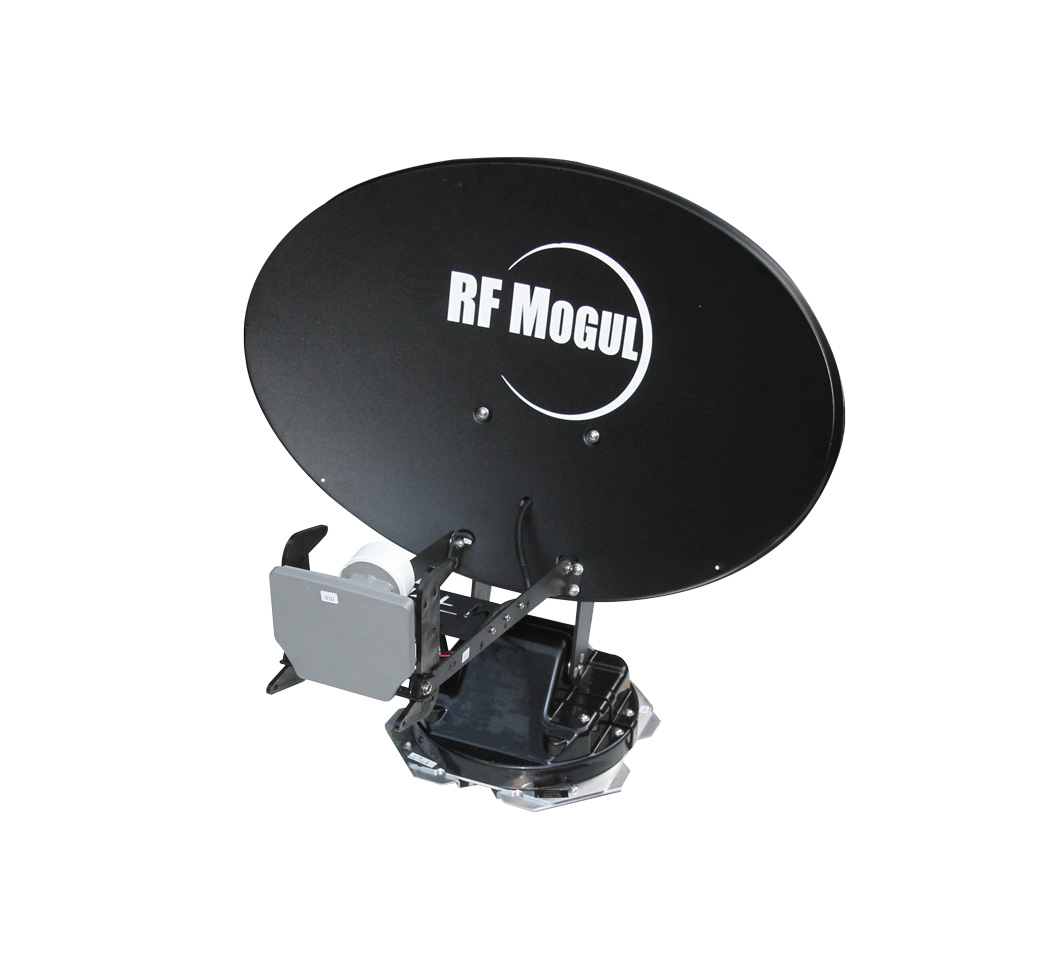
The RF Mogul Eagle TV automatic satellite system offers a number of advantages for RV owners, including the fact that it is field serviceable and allows a choice of various providers.
By Mark Quasius, F333630
May 2021
Satellite TV is very popular among RV owners. It’s a great option for people who want to take all of their favorite channels along when they are mobile or who frequently camp where broadcast TV signals aren’t available. Many RVers remove their satellite receiver from their home and drop it into their RV when they travel. Of course, to make it work, a receiver must be paired with a satellite dish, and many models are available — from small portable units to fully automatic ones that mount to the roof of an RV.
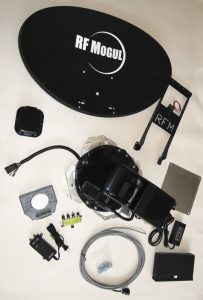
The RF Mogul kit included all the necessary hardware for installation.
Our coach came with a factory-installed automatic dish. However, after five years, it failed, with numerous errors and motor issues surfacing. Unfortunately, this brand was not field serviceable, so I could not repair it. I could send it back to the factory for repair, but comments in numerous RV forums clued me in to the fact that this could take a long time, and I wouldn’t even know the cost until after the unit was inspected. Plus, I would have to remove the unit from my roof, box it up, and pay to ship it.
Further forum research revealed that a number of owners who encountered the same situation decided to replace their dish with a unit from RF Mogul. The dish had glowing reviews. When I found out the unit was field serviceable, I was convinced, and I ordered one. It arrived quickly, which was great, because I had a trip planned, and that would be a perfect way to test the system.
Features
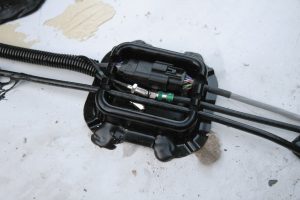
The kit included a raised connection box to protect the coaxial and communication cable connections.
The RF Mogul Eagle TV automatic satellite antenna system includes many features that impressed me. First, as noted, it is field serviceable. If I ever need parts, they will send them to me, and I can repair it and be on my way. Also, it is capable of handling DirecTV, Dish Network, Shaw, or Bell. All it takes is a swap of the low-noise block downconverter (LNB) arm and a software update to the controller. I currently use DirecTV, but I may want to switch to Dish at some point, so that would be easy. In addition, the RF Mogul unit uses GPS to find its position and locate the satellite, which makes connecting with the satellite faster. It handles 4K, HD, and Ka and Ku bands. At 8½ inches, it reportedly has the lowest stowed height of any dish, which makes it easier to fit on the roof. All the electronics are located in the controller inside the coach instead of in the dish itself, so they are better protected from heat and moisture.
Installation Considerations
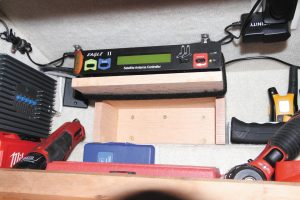
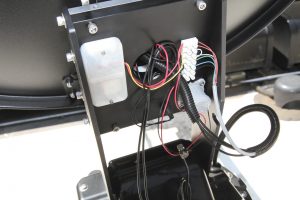
Inside, the coaxial and communication cables were connected to the controller module, which was placed in the front overhead compartment.
The RF Mogul with GPS is a bit more sophisticated and requires a 12-pin cable to allow communication between the controller module inside the coach and the dish on the roof. My previous dish had an 8-pin cable, which meant I was not able to reuse it. In addition, the RF Mogul requires the coaxial cable to run from the dish to the controller and then on to the splitter that feeds the satellite receivers. My previous dish ran directly to the splitter, so I had to run some new coaxial cable as well.
The awnings on our coach were mounted on the roof with a raised front cap to create a flush appearance. This left me room to pass any rooftop cables through the backside of the front cap, where they could enter a cabinet in the front overhead area. I determined this was going to be the best location for the controller.
The Installation
The RF Mogul arrived with the components required for installation. All I needed was the correct sealant for my roof. But first came the fun part: removing the old dish. To gain better access to the base of the unit, I raised the elevation arm. I removed the reflector dish to make it easier to handle, and then I disconnected the coaxial and communications cables.
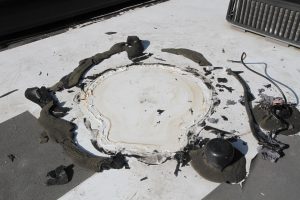
The old satellite dish was removed, an abundance of sealant removed, and the roof cleaned.
After digging through the sealant to expose the heads of the mounting screws, I removed them. I then removed sealant around the edges of the base unit and carefully pried it up. Next, I tied a rope around the 53-pound unit and lowered it to the ground, sliding it along my extension ladder to control the descent.
Then the cleanup began. I used a scraper to remove the heavy accumulations of sealant — being careful not to damage the fiberglass roof. Some RVs have rubber roofs, which makes the task even more challenging. I followed up with a 3M Scotch-Brite cleaning pad and acetone. After quite a bit of elbow grease, I had the roof reasonably well cleaned. I then used some epoxy to fill in the screw holes. A bit of final cleaning, and I was ready for the RF Mogul.
The instructions for the RF Mogul were extremely well documented and easy to follow. They recommend assembling the unit on the ground and then lifting it to the roof. At 39 pounds, it was lighter than the old dish, but since I was working alone, I decided to carry the base unit, LNB arm assembly, and reflector dish up separately and assemble them on the roof. Once I got everything on top of the coach, along with a few tools, I began the assembly.

Attaching the LNB arm only required tightening a few bolts.
As instructed, I began the assembly by connecting a 9-volt battery to the red and orange wires so as to raise the elevation arm to allow for easy access to the base of the unit. I then removed the back cover of the elevation arm to expose the wiring connections and mounting holes for the reflector dish. I attached the dish to the arm and pulled the coaxial cable that connects to the LNB arm through the hole. The LNB arm sticks out in front of the dish and collects the signal from the dish. Next, I attached the LNB arm to the unit and tightened all the dish mounting bolts. The RF Mogul has LED accent lighting to illuminate the face of the dish, so I connected those two wires on the backside of the dish.
The next step was to install the LNB to the LNB arm. At this point, I had a question about the directions, so I figured it would be a good time to call tech support to see whether the good comments I read were indeed true. As is true of most tech support lines, I got voice mail. Within five minutes, my call was returned. I explained where I was confused, and Maurice did an excellent job helping me out. Plus, the next week they changed their online installation instructions to make that point easier for others to understand. So, the tech support gets an A+ in my book.
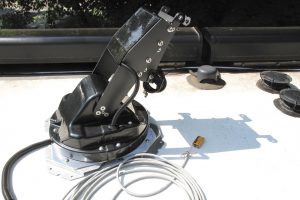
To facilitate access to the base of the unit, a battery was used to raise the elevation arm out of the way.
The next step was to mount the stow brackets to the end of the LNB arm. These serve to support the arm while it is stowed and resting on the roof. My previous unit had a hard poly roller that supported the arm, but I found that the arm moved around too much when traveling, and the roller started to wear a groove into the fiberglass roof. I overcame that by adding a piece of 3M Safety-Walk vinyl to that area to prevent rubbing. But the RF Mogul came with a nice stainless-steel plate to prevent this from happening, so I removed the old vinyl and cleaned up the surface of the roof.
The RF Mogul is 37 inches long when stowed, whereas my previous dish was 44 inches, so I had a little bit more room to position the new dish. Once I determined the exact location, I marked everything off and drilled the mounting holes. I then added self-leveling sealant beneath the mounting pads, installed the mounting screws, and covered them with more sealant. I mounted the stainless-steel plate in the same manner.
LED accent lighting was wired to the existing connectors on the backside of the main arm.
I removed an existing cable cover plate from the backside of the front cap, where the cables for my cell phone booster ran. I drilled a second hole and ran both the coax and communication cables through and down into an overhead cabinet inside. This cabinet is used to store some of my tools, but it had plenty of open space near the top, so I made a shelf and mounted the controller module to it, adding a hook-and-loop fastener strap to keep the module in place while the RV is moving. I then ran the coax cable that leaves the controller down to the satellite TV distribution splitter and power inserter in the basement, where it feeds all the satellite receivers in the coach. After I made the required connections to the controller, the system was ready for testing.
Testing
My driveway is surrounded by trees, prohibiting a clear view of the southern sky, so my testing was reserved for our first night on the road. I pulled into the campground and switched on the system. I performed the initial synchronization procedure to marry the controller to the dish and then pushed the search button. I walked outside as the dish quickly found its GPS location and then raised and rotated to find the satellite. A tree branch overhanging our coach was partially obscuring the dish, so I didn’t expect to get a signal. But, to my surprise, when I went inside, I found the TVs working. I didn’t expect that, based on past experience.
I should note that when setting up camp, owners should check for obstructions, such as tree branches, that could prevent the dish from raising. It extends 33.5 inches above the roof.
We had a number of overnight stops during this trip, and I was very impressed with how rapidly the RF Mogul locked onto the satellite. Both raise and stow procedures were much faster. The GPS built into this unit really made a difference. Our old dish would rise up and rotate, trying to find the satellite, and then continue on in steps until it finally found it. The GPS on the RF Mogul tells it just where to look, so it goes right to that area and then peaks the signal. It also locks in with a stronger signal.
All satellite dishes encounter rain fade when the rain clouds darken the sky, but the RF Mogul gave us more signal strength, and we retained good reception until the rain came down stronger. With our previous dish, we would have been out of service much earlier. I didn’t think there would be any difference, because the dish and LNB are the same as what is used on most setups, but the proof is in the results.
Further research revealed that the signal improvement was mainly the result of three factors. One, the tighter tolerances of the mechanism allow for very accurate aiming without any free play or movement by the wind. If you grab the unit while it is extended, you can’t feel any movement in the elevation, azimuth, or skew. Two, the tighter tolerances of the steel gears used in the RF Mogul give it a closer lock on the satellite. The cast steel and nylon gears of my previous unit had quite a bit of play, which allowed for signal drift, especially in windy conditions. And, three, the GPS adds a bit more accuracy, working in combination with some sophisticated algorithms to allow for extremely accurate peaking that yields the strongest possible signal.
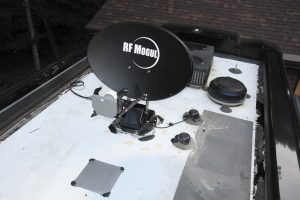
With the installation complete, the dish looked good and worked well.
My final test was at a campground in Wyoming. We stay at this campground frequently on our trips out West, and we always request our same favorite spot. But many years ago, we lost the ability to use our satellite dish, because the nearby oak trees kept growing. It wasn’t specific to any one RV, either, because all four of the motorhomes we have owned over the years had the same issue. We just gave up on satellite TV in that location.
Just for kicks, I figured I’d try it with the new RF Mogul dish. The system took a bit longer to lock on, but it actually did find the satellite. I had satellite TV inside the coach! My DirecTV system had a triple LNB, so some of the channels reverted to standard definition because the outer LNBs couldn’t see through some of the heavy limbs. But we were still able to watch our channels, which was amazing for this location. Overall, I have to give this satellite dish two thumbs up.
Further Information
RF Mogul
3604 Via Terra
South Salt Lake, UT 84115
www.rfmogul.com
(801) 895-3308