
Maintaining homelike comfort in one’s RV requires attention to the air-conditioning, heating, and ventilation systems.
By Chris Dougherty, F263059
May-June 2026
As an RV technician, if I had a dollar for every time I received a call about an air conditioner not cooling, only to find the unit was not maintained. . .
An RV is a relatively confined space, and as such, dirt, dust, pet dander, and other materials are more concentrated than in a larger area. When they get into the air conditioner, furnace, or vents, the best scenario is a loss of efficiency. The worst is that air conditioners fail, furnaces smoke (or worse), and the dirt contributes to an unhealthy atmosphere in your RV from mold and mildew.
In this article, we’ll review the simple steps an RV owner can take to keep their RV heating, ventilation, and air-conditioning systems functioning at top efficiency while maintaining a fresh air environment for all occupants.
AIR CONDITIONING
Of all the HVAC (heating, ventilating, and air conditioning) elements in an RV, the air-conditioning system probably requires the most attention, involving regular filter cleanings and visual inspections.

A neglected filter can cause debris and dust buildup.
Air conditioners and heat pumps work on the same principle: They remove heat from the evaporator side and release it on the condenser side. Switching the roles via a reversing valve, a heat pump absorbs heat from the outside atmosphere and releases it inside the RV; this differentiates a heat pump from an air conditioner.
RV air conditioners contain a sealed refrigeration circuit. So, aside from cleaning the coils and straightening them with a coil fin comb when necessary, no other maintenance is required. The exterior fan and coils are not protected, and they can become clogged with debris or mud from daubers. Clean them with a water spray gun. Be careful to avoid damaging the fins when doing so.
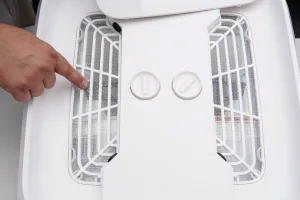
A partially removed Furrion air distribution box revealing the filter inside.
The inside coil should stay pretty clean as long as the filter is maintained. Manufacturers construct the filter(s) from a plastic woven material, similar to a Scotch-Brite pad, which allows air to flow through. The weave catches dust before it can reach the evaporator coils. But if too much dust collects, an excess amount will flow to the coils, plugging them up. These clogged filters can also affect the airflow that enters the system. Since this dust contains many allergens, it can be hazardous to your health. The coils can be vacuumed with a dust nozzle. More serious dirt that has become wet from condensation and turned to mud will have to be physically cleaned from the coils and the condensate drain tray. In some cases, this may require the air conditioner to be removed and disassembled for cleaning — sometimes a multihour process.
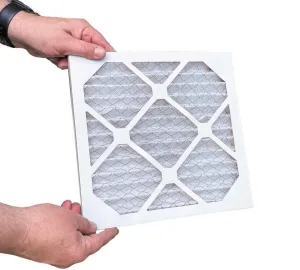
A 1-inch HEPA filter for the Coleman Mach air distribution box.
One way to avoid this is to upgrade to a HEPA filter, if one is available for your air conditioner model. A high-efficiency particulate air filter is similar to those used in a home HVAC system and is much more efficient at removing dust, dander, and other materials from the air.
While the plastic filters can be washed in the sink and reinstalled, HEPA filters must be replaced, so always have extras on hand. Coleman-Mach offers a HEPA filter air distribution box for their A/C systems, for example.
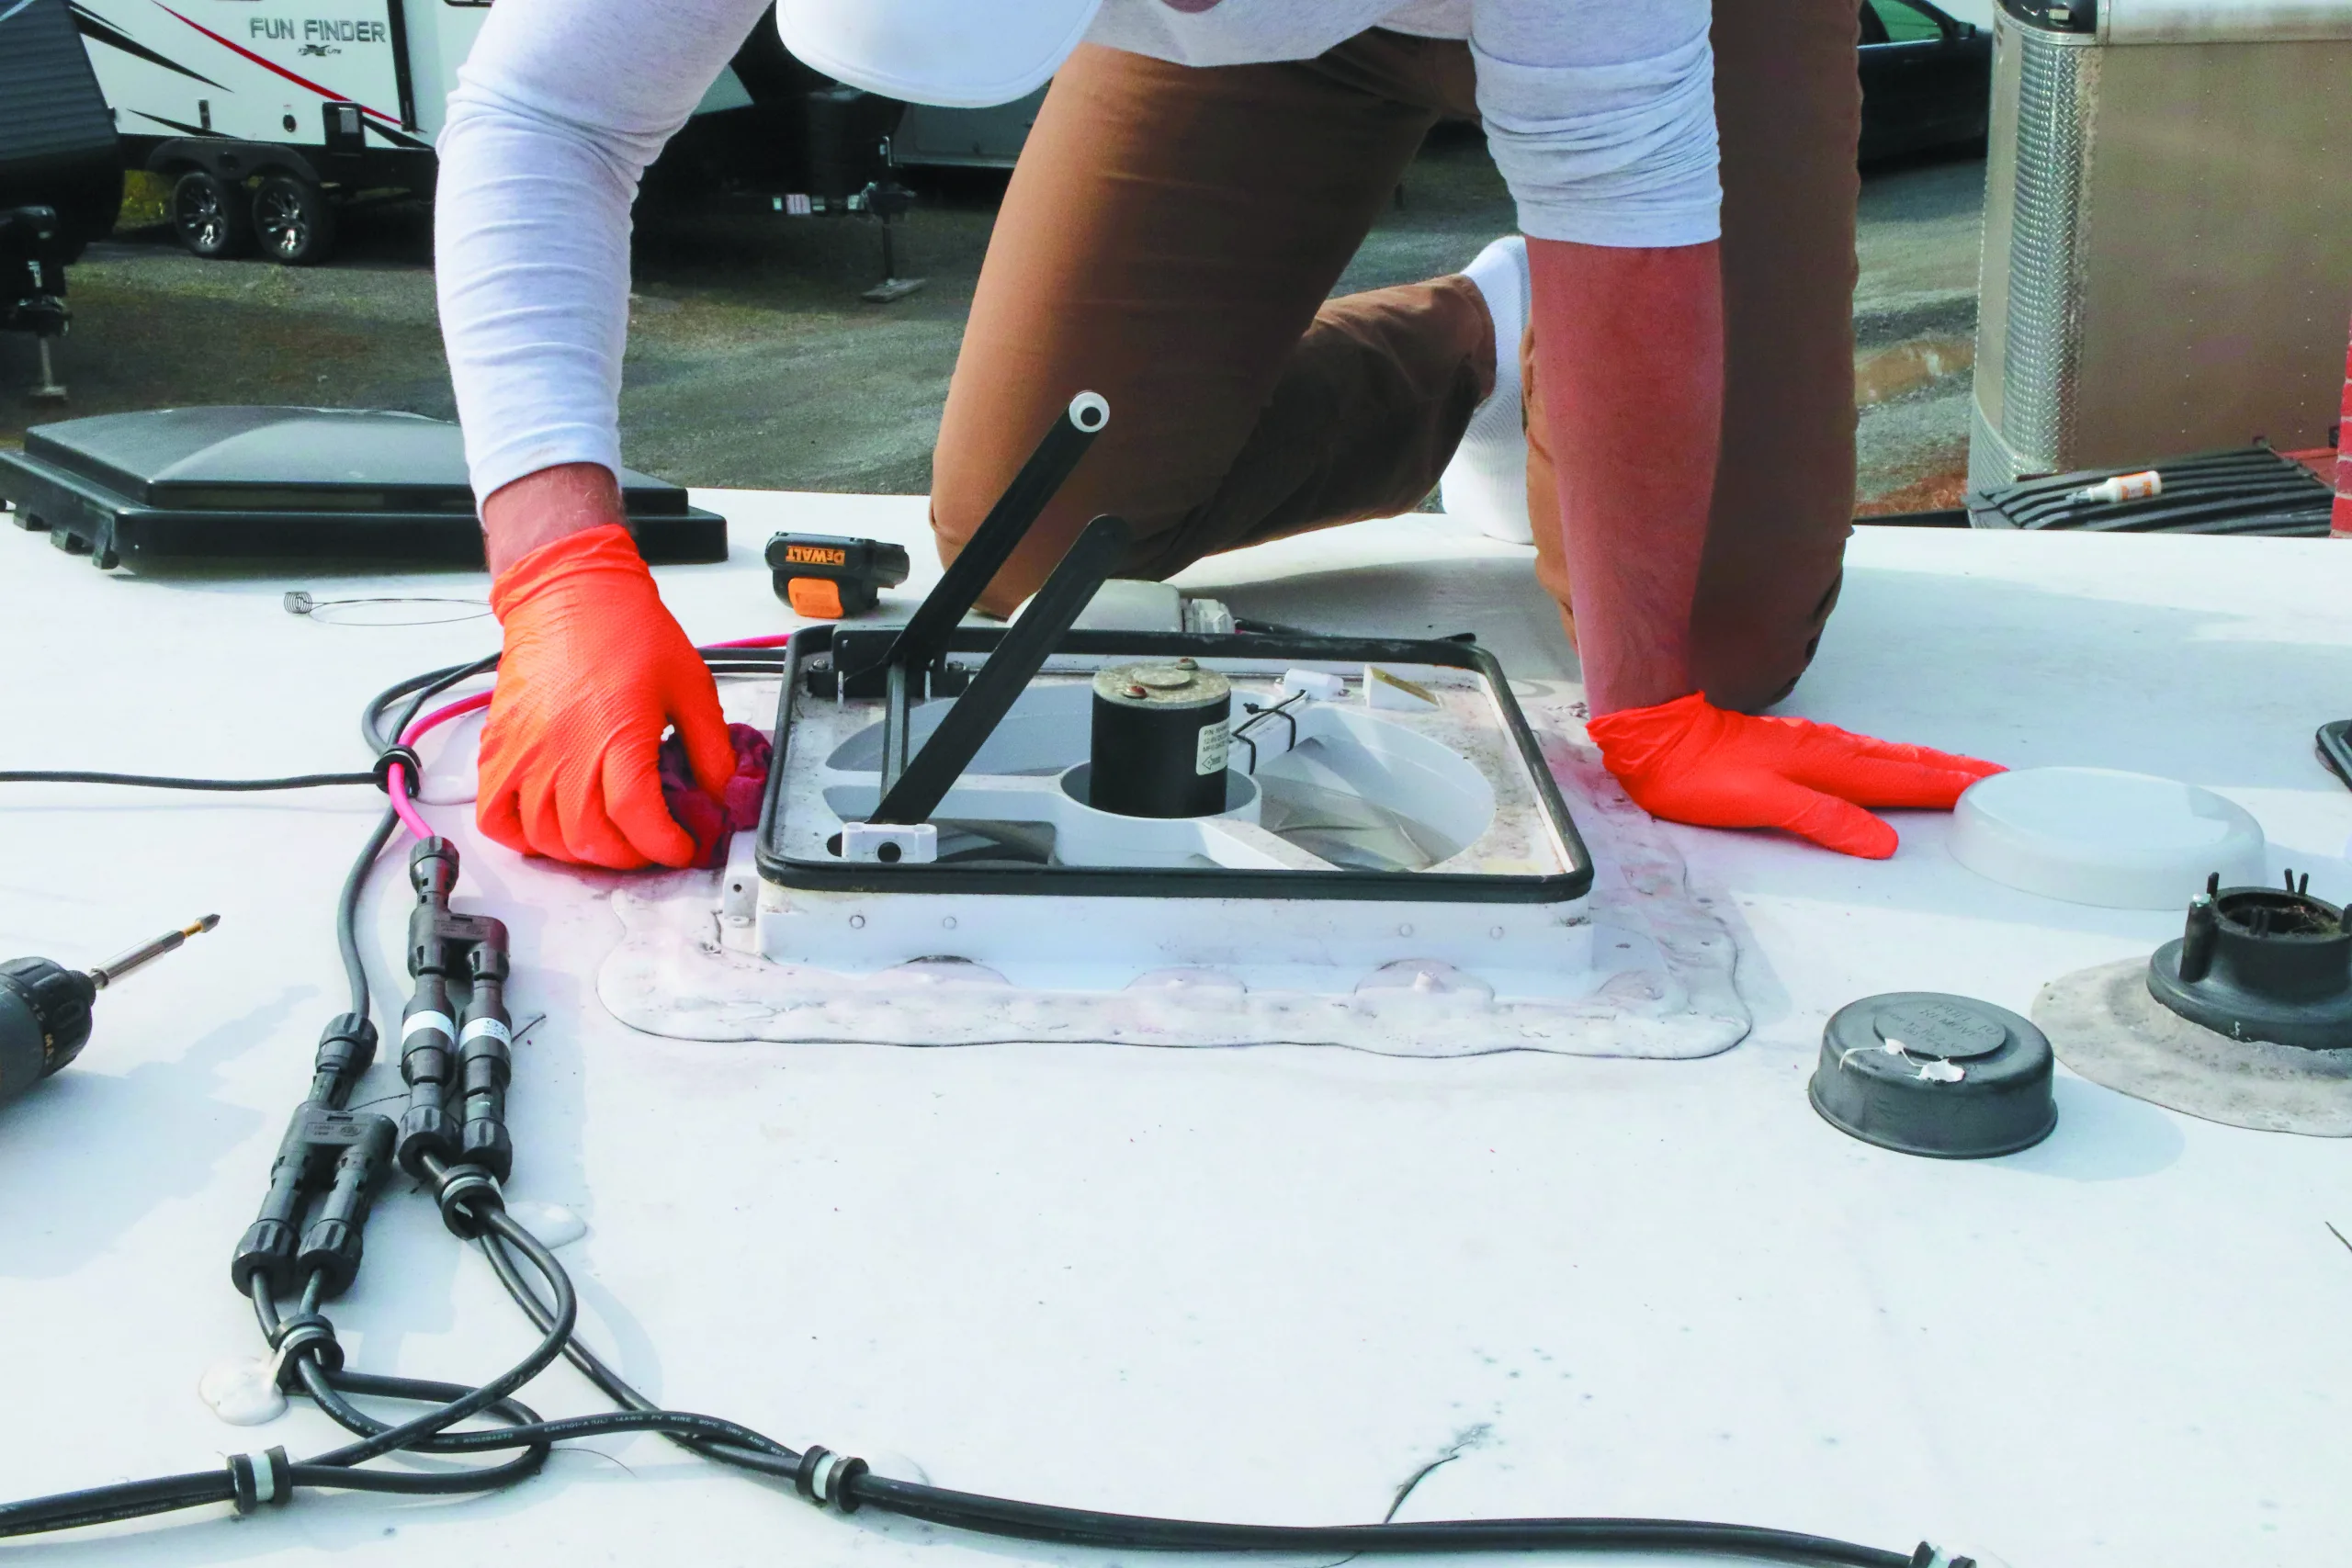
Other than cleaning the filters, if you see evidence of animal nesting inside the roof unit, that material should be removed, along with leaves, pine needles, and other debris under the cover. In addition, the A/C should look level or parallel with the roof surface, front to back especially. You shouldn’t be able to move it. If the unit appears crooked or loose, check the torque of the mounting bolts. Consult your A/C’s owners and installation manuals for the proper way to torque your model (typically 50 to 60 inch-pounds).
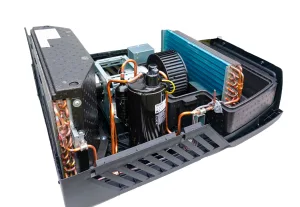
A disassembled Furrion air conditioner shows different parts of the unit.
HEATING/FURNACE
Many RVs employ an RV furnace powered by propane, and we’ll focus on that type of system in this article.
All propane furnaces are sealed-combustion, direct-vent appliances. The gas flame, fresh air, and exhaust are sealed from the inside of the living space and contained within a plenum, or casing. On the inside, the plenum (or casing) contains the airflow to ensure it travels over the combustion chamber, heating the air and pushing it through the RV, usually via a duct system, although some are direct discharge. They’re controlled by a thermostat that shuts off the furnace once the set temperature is reached. Safety mechanisms throughout the furnace ensure that the unit does not overheat, the fan works properly, and the unit has a good flame.
As long as the power, propane pressure, and airflow across the furnace are adequate, the unit should operate just fine. Often, unit failures result when one of these underperforms. Sometimes, “sensor” issues are to blame as well, including circuit boards; everything else should be ruled out first, however. Many times, the issue can be linked to the wall thermostat. Any abnormal resistance placed on the circuit board by a faulty thermostat can affect the control board and/or gas valve, resulting in a variety of furnace failures.
Many factors can have a negative effect on propane RV furnaces. These include mud daubers, paper wasps, mice, and super furry/shedding pets.
Mud daubers build their mud nests inside the air intake and exhaust of an RV furnace, which can block airflow, creating a fire risk.
Paper wasp nests are combust-ible, and can block air, which creates obvious problems.
Mice will fill ducting with filth and nesting material. They can also get into the RV side of the plenum to nest in there, as well as around the squirrel-cage fan. This can create a dangerous situation if the furnace is turned on with nesting in the furnace.
Last, there is no filter system on the interior intake side of the furnace, and this is intentional. Unlike a home unit, an RV furnace has narrower tolerances for airflow and overheating, and a HEPA filter can reduce airflow to the point where the furnace can overheat and start cycling off its thermal safety thermostat. This is not ideal.
As a result, if you have pets that shed a lot, make sure to vacuum inside the furnace intake area more regularly. All the extra dust and dander can be drawn into the furnace, creating a foul smell, or worse.
As for the other factors:
- Mud daubers and paper wasps can be kept out of furnaces via dauber screens, such as those sold by Camco. Yes, some manufacturers have warned against using these; however, in my experience, it’s more of a liability consideration than an actual issue. I have rebuilt many furnaces because of damage caused by insects and other materials in the furnace intakes and exhausts, which don’t happen with such screens in place. Use of any non-OEM accessory may void the warranty, but in this case, I think the risk is minimal. Your call.
- Paper wasp nests can be found in just about any opening in an RV or appliance, including the furnace, water heater, air conditioner, rock guard, refrigerator vents, etc. Watching for and eliminating the nests early is the best solution, along with using vent screens.
- Keeping mice out of parked or stored RVs is an enormous challenge. They can cause extensive damage, which can be downright dangerous if RV furnaces are affected. While this could be its own article topic, preventing rodents from making themselves at home inside an RV, especially a sensitive area, can require creative thinking.
Many RVs with “four-season” packages tout a “heated basement.” This often incorporates a small 2-inch flex duct that hangs in the space between the floor and underliner in the frame space. If mice can crawl into this tube (think of those hamster cages with tubes, like the Habitrail brand), then they have access to the inside of the furnace — and the interior of the RV. Hardware cloth or steel wool can be an effective way to keep mice out while not obstructing airflow.
If you suspect your RV furnace has been visited by mice, don’t use it. Have your favorite certified technician tear down, clean, and inspect the furnace first.
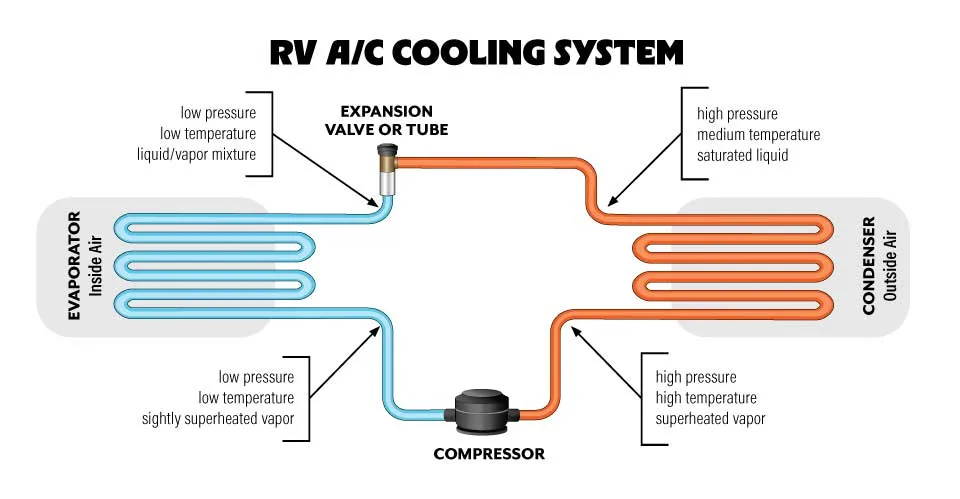
Cooling systems absorb heat from one area and release it to another. Heat pumps have a reversing valve that swaps the evaporator and condenser fins, absorbing heat from the outside and delivering it inside the RV.
VENTILATION
Good ventilation is extremely important in an RV — not just for comfort, but to reduce odors and humidity, remove stale air, and introduce fresh air into the interior, especially when operating unvented appliances like a gas range or stove. Plus, covered roof vents can be left open when the RV is unoccupied, which helps to reduce mildew growth and moisture damage. And, it’ll just make the RV smell better!
Most RVs utilize rooftop 14-inch-by-14-inch crank-up vents; many are equipped with high-flow fans. When these are combined with a vent cover, you can have great fresh air exchange throughout an RV.
These fans don’t need much attention other than regular cleaning. The newer models of MaxxAir brand covers have hinges and pins that allow easy rooftop access for cleaning and maintenance. Many high-volume fans by MaxxAir, Dometic, and others contain easily removable inner screens that can be cleaned in a sink. Glass cleaner works great on the rest of the surfaces. If gaskets are sticky, making it hard to raise the cover, treat them with RV slide-out seal conditioner. Silicone lubricant, or whatever the manufacturer recommends, works well on the mechanical parts.
If you don’t have vent covers, close your vents when you leave the RV. If a storm should come along, you could end up with a flooded interior — unless your RV has a Maxxfan rooftop unit or similar product with rain sensors, which automatically closes the dome when it detects rain.
Regardless of the type of vent you have, keeping it clean and operational is key. Cleaning and maintaining your
air conditioners, furnaces, and vents will go a long way toward ensuring
a worry-free, breakdown-free trip.
TESTING YOUR A/C FOR PROPER OPERATION
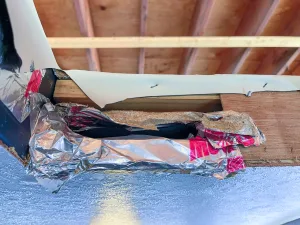
Examine the condition of the foil tape in various parts of the RV’s A/C system.
Ever wonder how to find out if your RV A/C is working properly when it’s super hot outside? The first thing you should do after cleaning the unit is to run it for 10 minutes, making sure that air flows from every register or outlet in a ducted system along the roof. If the flow seems weak (you can use an anemometer to check), you may have leaks caused by failed foil tape around the air distribution box and around the registers, or at the seams or ends of the ducts. While the last two aren’t easily fixed, you can replace the tape around the distribution box and register(s). Remove the ceiling assembly (if accessible) under the roof air conditioner and replace the aluminum tape in there; remove and check each ceiling register, replacing the tape on each of those. The tape is a bright silver color and is available at most home improvement stores.
Once you have good airflow in your system, make sure the A/C is operating properly by checking its Delta temperature, or Delta-T. You will need a thermometer probe to do this. If you have a multimeter like the Southwire 21550T AC/DC clamp meter, or a similar model that includes a temperature probe, you’ll be all set. Read the Delta-T, run the A/C on high in warm to hot weather for 10 minutes, then put your probe directly into the return or input airflow and take a reading. Then do the same in the discharge airflow at the closest outlet or register and record that. You can also point your infrared (IR) thermometer into the duct. Subtract the discharge air temperature from the return air temperature. (If you have more than one A/C unit feeding the same ducting, be sure to turn off all but the one you’re testing.) Most air conditioners run properly if the difference is around 20 degrees. The bigger the difference, the better, but 20 is acceptable most of the time. An RV rooftop A/C unit should not be expected to exceed a Delta-T of 20 degrees. Keep in mind that factors such as humidity or a cooler outside temperature may affect A/C performance.