
By Gary Bunzer
December 2019
Strange Accumulation
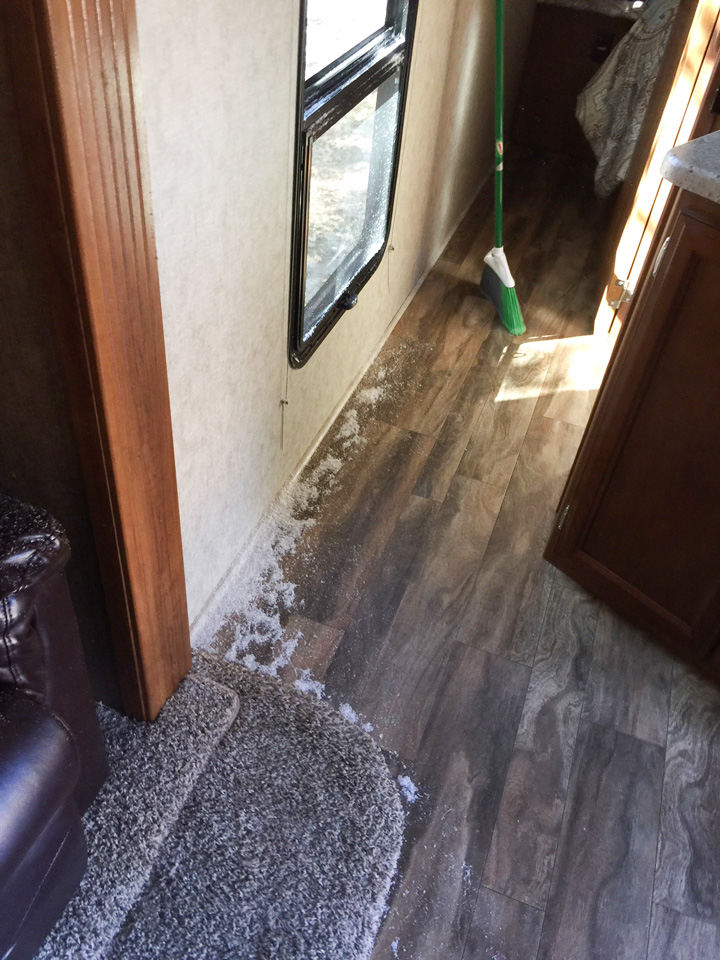
Our 2016 RV is stored long-term in an RV park about 120 miles from us. We’re puzzled by an issue, and, unfortunately, we can’t easily take the RV back to the dealer for service. Recently, a white foam substance has accumulated on the floor under a hall window, and I also noticed it under the rear cabinet below the rear window. We’ve been vacuuming it and wiping things off. It doesn’t seem to come from any ducts, and it isn’t near the heater vents. Any ideas?
Terry Howel
Via email
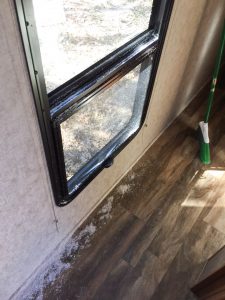 It’s quite difficult to tell with certainty, Terry, but it reminds me of a white mold I’ve seen before. According to one source reporting on this type of mold (if that’s really what it is), most indoor fungi like this are from the family of molds that include alternaria, cladosporium, and aspergillus. Yours could be a form of mildew that, left unaddressed during the storage period, has developed into a mold. It appears very much like efflorescence, which usually is fluffier in appearance and typically forms on brick or concrete surfaces. Efflorescence often is mistaken for white mold, but the former cannot grow on wood, metal window frames, or other synthetics like yours is doing.
Assuming it is a mold, it’s a good idea to treat the affected areas in addition to cleaning them. Consistent exposure to white mold could be harmful to humans, but not nearly as detrimental as black mold. Some experts recommend using simple white vinegar to treat the affected areas. I would try this:
*Vacuum all that you can, using a soft brush to loosen the mold first, if necessary.
*Using a sponge, clean the area with dishwashing detergent and water.
*Repeat the cleaning process a couple of times.
*Be sure to throw the vacuum bag in the trash.
*Saturate the affected areas with white vinegar and allow them to air dry. Again, a couple applications may be necessary. After the area has dried, clean it again with mild dish soap and water to remove the vinegar residue.
Several members of Family RVing’s Technical Advisory Committee also offered suggestions for other mold removal products, such as hydrogen peroxide, Tilex, and OxyFect G. In severe cases, it may be necessary to call in a mold specialist, but try the DIY remedy first, assuming it is indeed mold.
I’ve also heard of critters getting inside the wall and, through their work, creating little particles similar to this that can be forced out of the foam insulation in the walls. Can you definitely tell it’s not particles of foam insulation? Perhaps one of our eagle-eyed readers can clarify through the photo you included.
Keep in mind, if it is mold, it usually is caused by moisture getting inside the RV. Be sure to have a certified RV technician inspect for leaks. Moisture intrusion is the number one cause of RV damage.
Orphan Parts Dilemma
I recently purchased a 1995 Europa motorhome, built by USA Motor Corporation on a Chevy chassis. One of the first repairs involved having parts made from scratch. Now, RV technicians have been unable to find a motor for the power windows. I am surprised, since it is a Chevy. How do I determine whether parts not being available represents shades of things to come? I don’t want to throw good money after bad. I’m told that not many Europa models were made, but I often read that people buy coaches much older than mine and fix them.
Eileen Branscome
Via email
The problem of finding parts for what we call “orphan” RVs is all too common. Unfortunately, there is no way to avoid it, especially with older RVs, without knowing from what vendors the coach builder purchased the original parts.
Many of today’s parts and pieces are from well-established vendors, making replacement parts easier to find — but only to a point. When manufacturers change vendors for a similar part, they, too, often quit stocking from the first vendor. This usually isn’t a problem with common parts that are plentiful in the RV aftermarket. In some cases, a smart tech can find some kind of work-around for orphan parts.
Most large cities have shops that specialize in motor rewinding/rebuilding. Perhaps one in your area can repair your existing window motor. It can’t hurt to ask around. Also, a few companies make power windows for hot-rod builders. You might do an internet search for “hot rod power windows” and compare what they offer with what you need.
Wish I had better news for you, but this is a common drawback to some of the older coaches out there. By the way, I found an interesting website regarding the history of the Europa: www.oldbalddude.com/__trashed-2/.
Leveling System Awry
The lights on the panel for my Power Gear hydraulic leveling system go on and flash when the ignition key is turned on. When I press any button, the lights go out and the pump starts running. It stops only when the key is off. The jacks will not work at all. Help!
Dennis Rodrigue
Via email
Without running some troubleshooting steps and taking some electrical measurements, I’m thinking the control panel might be stuck in calibration mode. Before giving up on the control panel, try recalibrating it back to its zero point. Here is the procedure:
Start the engine, engage the park brake, and turn on the touch pad.
Push the “Front” button five consecutive times, and within 10 seconds, push the “Rear” button five consecutive times. All of the LEDs on the touch pad will begin blinking. This indicates that you have successfully returned the control box to the zero point calibration mode.
Set the zero point by placing a long level on the floor in the center of the coach, parallel with the chassis.
Push the “Man” button to enter manual mode.
Push the “Front” button until the jacks contact the ground. Once they do, hold the “Front” button until the jacks lift the coach approximately 2 to 3 inches.
Push the “Rear” button until the rear jacks contact the ground. Once the rear jacks are on the ground, level the coach using the long level.
After front-to-rear level is achieved, turn the level 90 degrees and level the coach from side to side using the “Left” and “Right” buttons.
Note: Recheck front-to-rear level after completing side-to-side leveling.
To store the zero point, push the “All Jacks” button three times. All the LEDs on the touch pad will stop blinking except the On/Off LED. The On/Off and Wait LEDs will blink for approximately 10 seconds. During this time, the control will look for one of the following instructions:
If there is no air dump or fill feedback to the control, the On/Off LED will stop blinking and the Air Dump/Fill feature will be disabled.
If there is air dump or fill feedback to the control, the On/Off LED will stop blinking, indicating the Air Dump/Fill feature is enabled; a buzzer will sound for three seconds.
All that said, unfortunately, some of the older Power Gear control panels are no longer supported. If further diagnosis indicates it is indeed faulty, contact Mark or Chris Bayus at M&M RV Electronics in Ohio City, Ohio (www.mmrvelectronics.com; 888-849-1615). They may be able to repair the old controller. But I’m hoping it’s a simple matter of recalibrating the system.