
After a blowout, the Rettroband functions like a spare tire within a tire.
By Mark Quasius, F333630
June 2020
A front-tire blowout is dangerous for any vehicle, especially a large one, such as a Type A motorhome. After a sudden loss of air pressure, the tire bead — the edge of the tire that sits on the wheels — can fall into the drop center, or valley, of the wheel, which can cause the tire to come off the rim partially or completely. The result can be a flapping tire tread that damages a fender, or something far more serious, such as a loss of control that causes an accident.
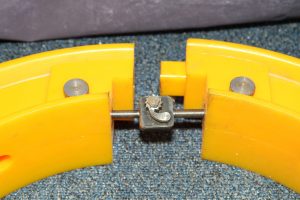
A tensioning mechanism draws the Rettroband halves together.
With the introduction of the Rettroband, RVers have a new solution. The Rettroband is designed to keep the tire on the rim, and it offers an additional advantage. After a blowout, the Rettroband can be driven on until you get to a safe area. In a sense, the Rettroband functions like a temporary spare tire, allowing you to travel farther without damaging the rim. Tests of the Rettroband during controlled blowouts did not show any sudden pull or lurch of a motorhome, and the vehicle remained easy to steer.
The Rettroband was developed in partnership with Robert Craig of Australia-based Craig International Ballistics, an Australian manufacturer of military and police body armor. The company drew upon its experience with run-flat tires for military vehicles to design a product for RVs traveling interstate highways. Rettroband is the product of 3½ years of designing and testing prototypes.
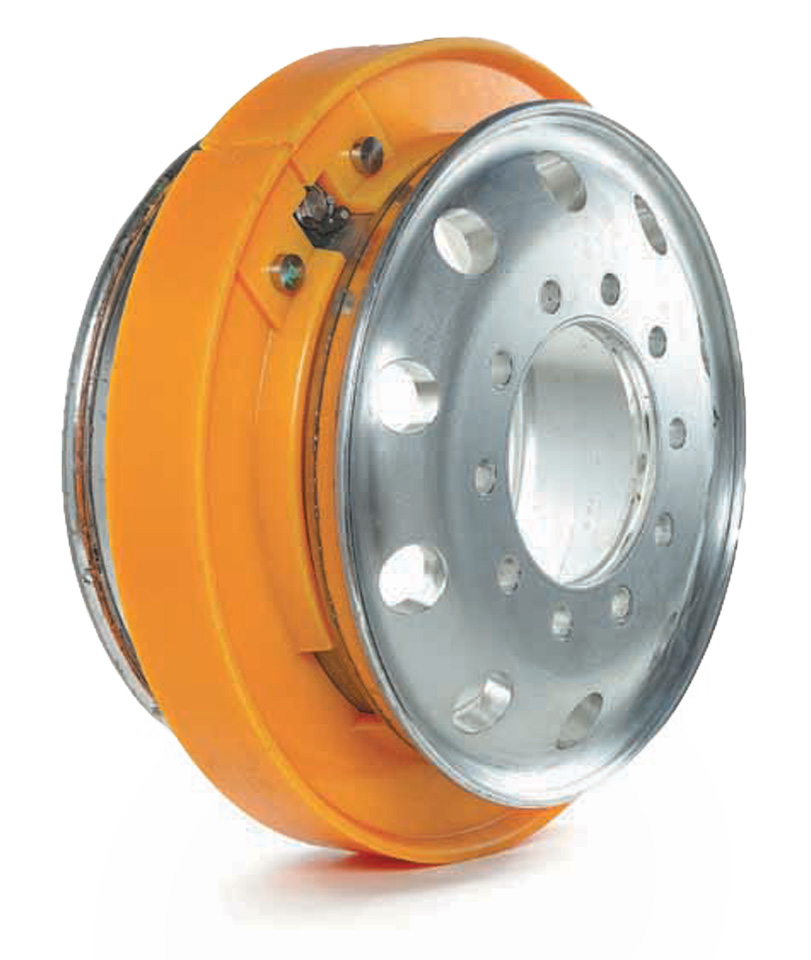
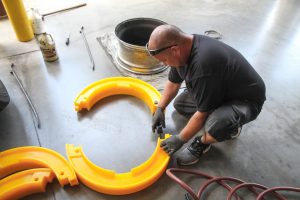
The Rettroband consists of a pair of yellow C-shaped polyurethane bands that clamp around the center of a wheel. A cutout area in each band accommodates internal sensors for a tire pressure monitoring system (TPMS). A pair of patented tensioning mechanisms are used to secure the two C-shaped bands together around the wheel. Anyone who services the tire can easily install or remove the bands with a standard 3/8-inch drive socket and extension. What’s more, Rettrobands can be reused after blown tires are replaced.
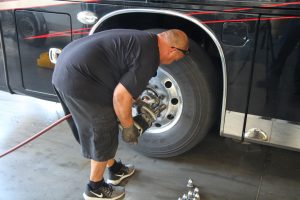
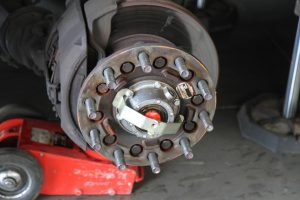
After lug nut covers and center trim caps are removed, the wheel is removed using a pneumatic impact wrench.
After researching this product extensively, I wanted Rettrobands for our Entegra Cornerstone motorhome. I contacted National Indoor RV Centers (NIRVC), the exclusive distributor of the product in the United States. NIRVC has four installation locations: Lewisville (Dallas), Texas; Lawrenceville (Atlanta), Georgia; Surprise (Phoenix), Arizona; and Las Vegas, Nevada. While on a trip to Texas Hill Country, we scheduled a stop at the Lewisville shop, where I was able to watch the installation.
The first step was to remove the trim — lug nut covers and center hub caps — from the wheel. The coach then was raised and properly supported, the lug nuts were removed, and the wheel and tire assembly was rolled off to one side. The valve stem’s core was removed to allow air to drain from the tire. Once the tire was completely deflated, the tire’s bead was loosened from the rim using a bead-breaking hammer. A bit of rubber lubricant was applied to the rim, making it easier to remove the tire using a pair of tire irons. With the tire off, the bead seating area of the rim was cleaned of deposits that had formed over the years. I chose this time to replace my SmarTire TPMS internal sensors, which were about halfway through their estimated life cycle. The wheel rim was now ready for the Rettroband.
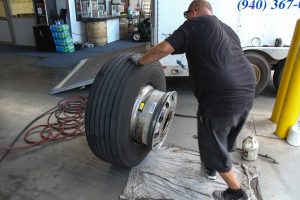
A tire is removed from the wheel using a tire iron.
As noted previously, tensioning mechanisms secure the two C-shaped polyurethane bands around the wheel. Adjusting a tensioner’s gearbox in one direction draws the polyurethane halves together, while adjusting in the opposite direction loosens them. At first, only one tensioning mechanism was installed in the bands, so they easily could be placed in the tire. Once the bands were nestled into the tire, the second tensioning mechanism was installed. Then, with the help of lubricant and a pair of tire irons, the tire, with the Rettroband inside it, was mounted to the wheel rim.
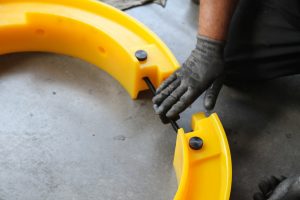
The tensioning mechanism is inserted into the end rods of the Rettroband, and the mechanism is given a few turns to start the threads.
Next, both tensioners were tightened with a 3/8-inch drive ratchet, extension, and socket to secure the Rettroband to the center of the wheel. A tire iron was used to keep the bead away from the rim to make it easy to adjust the tensioning mechanism. A quick check verified that the bands were centered on the rim and that my TPMS sensors were in the right spots. Then the tire was inflated to the correct pressure and mounted on a spin balancer. The installer slid a set of centering sleeves over a couple of wheel studs on the front hub to ensure concentric mounting of the steer tires, and he gave the studs a light coat of oil. The wheel and tire assembly was mounted on the hub, the lug nuts were installed, and the centering sleeves were removed. Finally, all lug nuts were tightened to the specified 475 foot-pounds of torque. A sticker applied at each valve stem indicates that the wheel is equipped with a Rettroband.
The tensioning mechanism after installation.
After I had driven 200 miles, I rechecked the torque, which always should be done with aluminum wheels.
I have not had to remove a Rettroband from a tire, but the process is simple. Remove the tire, deflate it, and loosen the bead. Use a socket and extension to loosen the tensioning mechanism, and then remove the tire using tire irons. Once the tire is halfway off, the Rettroband can be removed from the wheel.
Having the Rettroband system is like buying insurance. You hope you never need it, but if you do, it can be a lifesaver. Because it can be moved from coach to coach, it’s a one-time purchase (assuming similar tire size). The peace of mind alone is worth it.
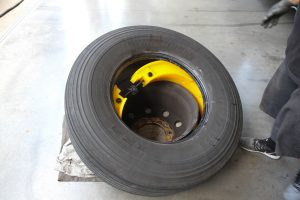
Once the Rettroband is inserted into a tire, the tire and Rettroband assembly are mounted to the wheel rim, a task made easier by using tire lubricant.
Testing the Rettroband involved placing an explosive charge on a motorhome tire and detonating it while the heavily loaded coach traveled at 65 mph. Video footage, including a cockpit view, showed no movement of the steering wheel after the blowout, and no effort required by the driver to maintain control. The motorhome was driven safely a number of miles at speed after the blowout, with no damage to the wheel or to the Rettroband. The test was repeated numerous times, with identical results. The video can be viewed on the Rettroband website.
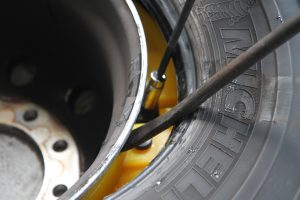
With a tire iron holding the tire bead away from the rim, the Rettroband tensioner is tightened using a 3/8-inch drive ratchet, socket, and extension.
Still, I had questions going into this. Adding a Rettroband to a wheel increases unsprung weight (that is, weight not supported by the suspension). In theory, that should make for a rougher ride, because the shocks must work harder to control the extra weight. And, the vehicle should be harder to stop because of increased rotational energy. The Rettroband also occupies a bit of space inside the tire; therefore, there’s less room for air.
But after driving my Rettroband-equipped motorhome in various road conditions, I found no measurable differences. The coach rode and handled just as well as it did prior to installing the Rettrobands, and the stopping distance did not increase. I attribute this to the 28-pound Rettroband being such a relatively small percentage of the total tire weight (approximately 200 pounds) that it isn’t noticeable. To determine precise differences in vehicle performance would require use of advanced measuring equipment or dynamic formulas.
The wheel hub assembly is ready for mounting.
Our coach is equipped with the SmarTire TPMS system. Its internal sensors report tire pressure and temperature, which can be viewed on the in-dash display during travel. That allowed me to monitor pressure and temperature changes and compare them with my typical pre-Rettroband readings. I saw no change. The tires ran at the same temperature as before. The change in air pressure as the tires warmed up also was the same as before. So, I concluded that the slightly lower volume of air in a Rettroband-equipped tire did not affect tire temperature, pressure, or load capacity. And according to Michelin, tire temperatures in properly inflated tires are a result of friction between the tire and the road; changing the amount of air inside the tire has no effect.
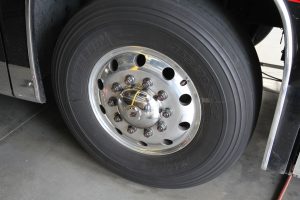
The finished product.
As of this writing, Rettroband is available for 22.5-inch tires. The price to outfit two steer tires ranges from $3,495.95 (tire section widths from 235 to 305) to $4,495.95 (section widths from 315 to 365). Prices include installation and rebalancing. Plans are under way for Rettroband to be made for 19.5-inch tires and for Type C motorhomes.
Although Rettroband Is not Inexpensive, It’s a one-time purchase that should last many years and can be transferred to Ir RV. Even more important, it’s an investment in the safety of your RV and its occupants.
More Info
National Indoor RV Centers
(800) 250-6354
www.nirvc.com
Rettroband
(469) 443-4764
www.rettroband.com