
A primer for budding photographers and a refresher for those looking to improve their skills.
By Emily Fagan, F547779
November/December 2024
One of the most fulfilling aspects of traveling in an RV is taking photos, sharing them with friends and family, and reliving your memories. Capturing beautiful and engaging photos is a skill that takes time to master, but it’s not hard to learn. Plus, practicing is really fun!
Every photograph tells a story, re-creating a three-dimensional scene in two dimensions. This means the entire scene, from near to far, is made up of objects that relate to each other in terms of their relative size, position, and clarity. The layout of a photo is called the “composition” of the image, and it is arguably the most important aspect of photography, whether you use a cellphone or a top-of-the-line camera.
Have subjects face away from the camera to highlight the surroundings and draw the viewer into the landscape.
With that in mind, before whipping out your phone to take a pic, pause and think about what you want to emphasize in the image. Larger objects dominate the composition. So, if you are taking a photo of a person, a close-up that fills the picture is all about the person and not about the place where they are located. In contrast, an image with tiny figures in a vast landscape is all about the setting; the people are accents.
By the same token, you also can highlight either the people in a scene or the landscape around them by having them face toward or away from the camera. We are instinctively drawn to the eyes and facial expressions of people looking at us. So, if you want to emphasize the people, have them face the camera. If you want to draw the viewer into the landscape, have them turn away from the camera, looking at the vista. This encourages the viewer to look at the landscape along with them.

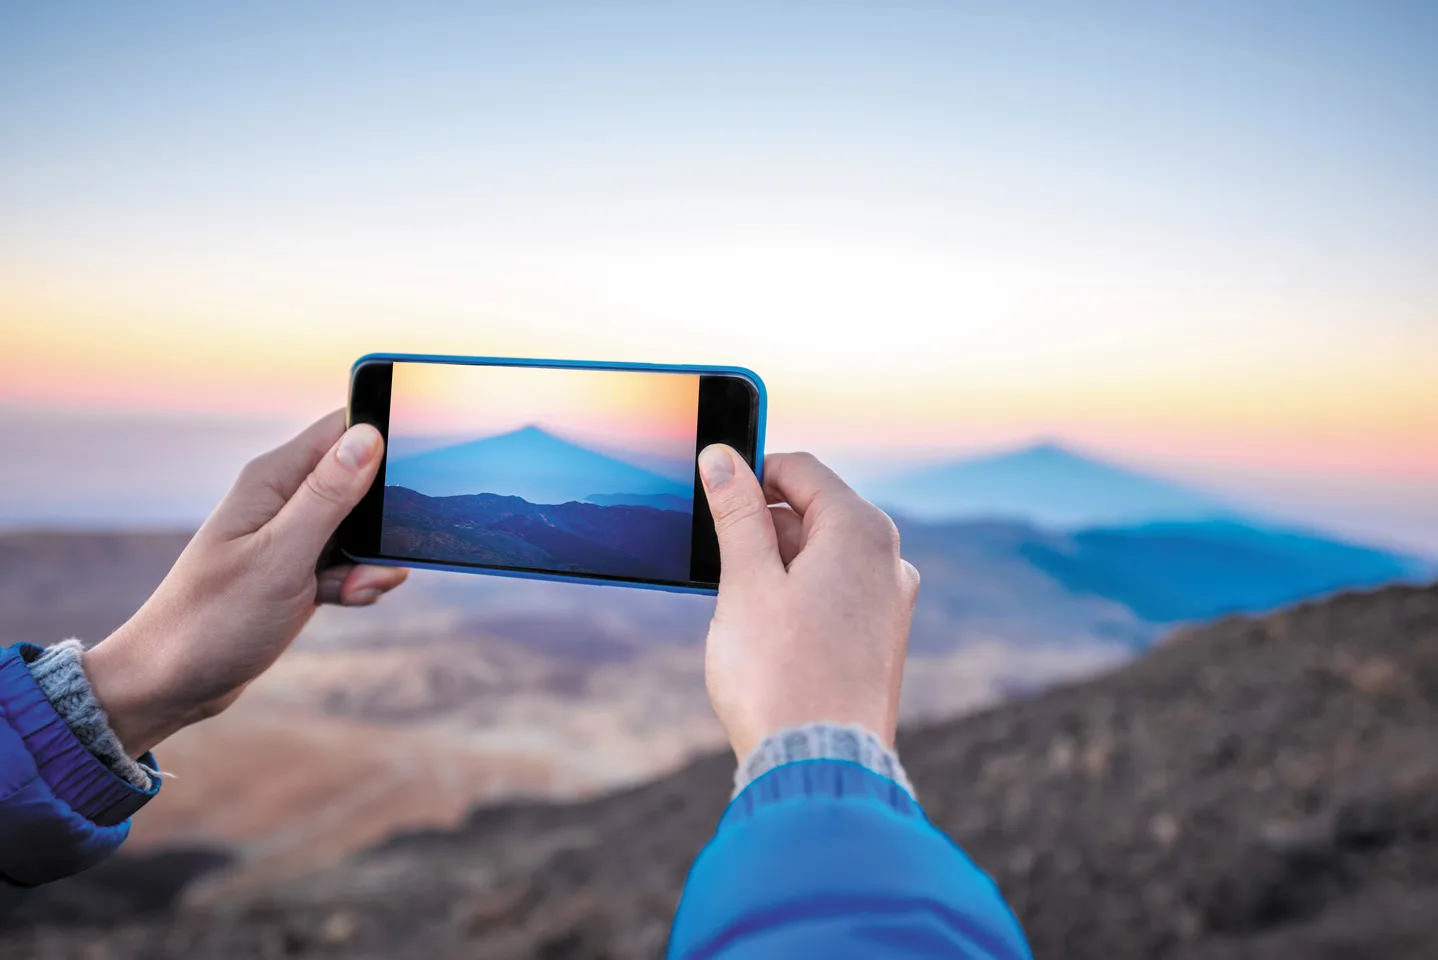
Consider proportions. For example, a fiery sunset that takes up most of the frame creates drama.
The relative proportions of the objects in a photo also accentuate the subject. If you are witnessing a stunning sunset where the sky appears to be on fire, most of the image should feature the colorful sky. If you find a dazzling field of wildflowers that seems to go from horizon to horizon, fill the image with flowers. You can anchor the location with something iconic to the region, like cacti or mountains.
Capturing the majesty and immensity of America’s best national park landscapes can be challenging. Looking out across the layers of rocky ramparts that make up the Grand Canyon or staring down into the fairytale turrets of Bryce Canyon takes your breath away. However, it’s easy to come away with photos that aren’t as dramatic as what you saw. Sometimes simply adding a measurable object in the scene — a person, animal, or tree, for instance — can give the viewer a way to quantify the size of the surrounding landscape. A tiny figure walking between massive rock formations or standing atop a towering precipice emphasizes the enormity of the scene in relation to the person.
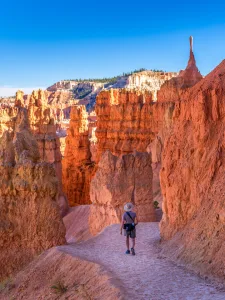
Adding a small figure to a composition contrasts the vastness of the setting, giving scale and depth to the scene.
Of course, we all want to have photos of ourselves in these magical locations, but it’s tricky to get good ones. A cellphone can be held at arm’s length, but the person holding the phone often looks distorted. A selfie stick improves the view by putting a little more distance between the camera and the people in the photo. A selfie stick isn’t required for a great selfie, however. Scout around for another tourist taking photos (preferably someone carrying a big camera, which may suggest they’re a good photographer); offer them your phone or camera and ask them to take a photo of you. Then return the favor. That way, everyone goes home with a souvenir photo of themselves.
Another way to draw the viewer into a scene is by using “leading lines‚” especially diagonals and curves. Set up the shot so the diagonal lines come out of the lower corners of the image and head toward the main subject. These lines are easier to spot in a two-dimensional photo than in our three-dimensional world. However, the edge of a road or lane lines painted on a road are an easy place to see them. Curvy roads make great leading lines, too. A winding road or trail leading to something alluring makes a great shot. We read from left to right, so positioning the diagonals to come in from the lower left corner catches our eyes, and we follow those lines into the center of the image.
Diagonal and curved “leading lines” guide the eye toward the photo’s subject.
Positioning the subject slightly off-center in the image can also add some spice. The “rule of thirds” suggests you place the major components of the image one-third and/or two-thirds of the way across the photo vertically and/or horizontally. This is not a hard-and-fast rule, however, and I find that just shifting the subject slightly off of center can make a huge difference.
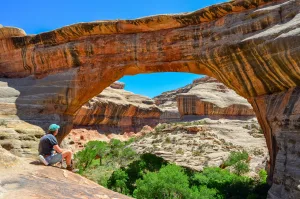
Similarly, a subject can be framed in an image by shooting through a window, under an arch, or between two trees. Framing one object between two others results in three primary things in the image, and often a great balance or “tension” in a photo is achieved by the triangle that is formed between them.
Applying these concepts takes practice. One of the best ways to improve your skills is to study the work of great photographers. Many excellent photo galleries can be found online. For example, search for “best online photography galleries.” Join 500px.com, where you can view photos taken by many fine photographers and share your own. For landscape photos that will knock your socks off, plus detailed shooting tips, subscribe to LandscapePhotographyMagazine.com.

Selfie sticks increase the distance between the camera and subject, reducing distortion.
Another way to practice composition is to take photos from the passenger’s seat as another person drives. My husband and I travel primarily on secondary roads, and as the scenery passes by, I watch the ever-changing relationships between the nearest and farthest things in view, snapping photos when they align best. If you use a digital single-lens reflex (DSLR) or mirrorless camera, a polarizing filter eliminates the dashboard glare that reflects on the windshield.
Another outstanding tool for improving composition is photo processing software such as Google Photos, Adobe Lightroom, or Photoshop, which allows you to play with cropping your images. Many cellphones also have photo-editing features. Cropping to various sizes helps you pinpoint where the most interesting part of your image really lies. These software packages also allow you to enhance or change the colors, lighten the shadows, and decrease any overly bright highlights. Using sepia tones for an image rather than the full color spectrum gives an “antique” look to a photo, and an “almost perfect” image becomes an Ansel Adams shot when it is transformed to black and white.
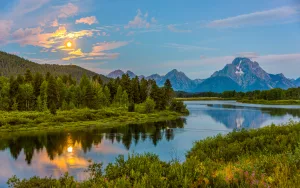
The most dramatic natural colors occur at sunrise and sunset. It is worthwhile to continue taking photos after the sun has risen and to begin taking photos an hour before the sun goes down, as the landscape is bathed in a golden glow with deep shadows at these times. The exact same photo shot at noon will be far more appealing when it’s taken during either of these “golden hours.”
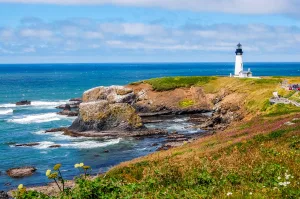
The “rule of thirds” creates an imaginary grid with nine sections. Placing the main subject, such as the lighthouse, on a grid point or line heightens interest.
Early morning is also a time when the air is still, allowing for beautiful reflection photos at lakes and ponds, because the water is like a mirror. Delicate wildflowers stop wiggling, too. Another huge reward for climbing out of bed before you really want to is that animals are active at dawn. Thus, it’s a great time for wildlife photography.
When shooting wildlife with a DSLR or mirrorless camera, set the shutter speed quite high (above 1/2000 of a second) to catch their movements without blurring. Approach animals slowly and avoid eye contact to prevent scaring them away. Once you’re set up, focus on the animal’s eyes, as that is what people are drawn to.
You can lure hummingbirds to your campsite by hanging a suction-cup-mounted hummingbird feeder on your RV window and then shoot through the window from inside. Other critters and small birds will stop by if you place a shallow dish of water on the ground away from your RV where they feel safe. Many chipmunks in campgrounds are experienced beggars and may treat you to great photo ops when they stop by for a drink!
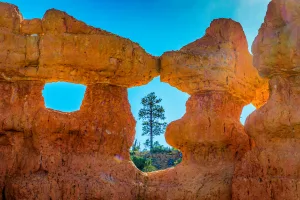
Placing one object between two others forms a triangle that enhances balance and visual interest in your photo.
Waterfalls and babbling brooks provide an excellent opportunity for DSLR and mirrorless camera shooters to use a very slow shutter speed to make the water look like a silky, flowing stream; 1/15 second or slower works well and is easiest with a tripod. Leaving the shutter open for an hour or more creates fabulous star trails in the night sky.
A slow shutter speed can also emphasize movement in a photo. When an animal or other object zips past, use a modest shutter speed (1/60) and pan the camera to follow them as they go by. They will be sharp while the landscape behind them appears blurry. Likewise, with the same shutter speed, keep the camera still as you take the shot; their motion will be blurred and appear fast-moving while the landscape is motionless and sharp.
Above all, have fun taking pics. Photography is a rewarding lifelong endeavor, and an ideal hobby to accompany your RV travels.