

Motorhome owners can make this timesaving, compact device using inexpensive parts.
By Mark Quasius, F333630
March 2019
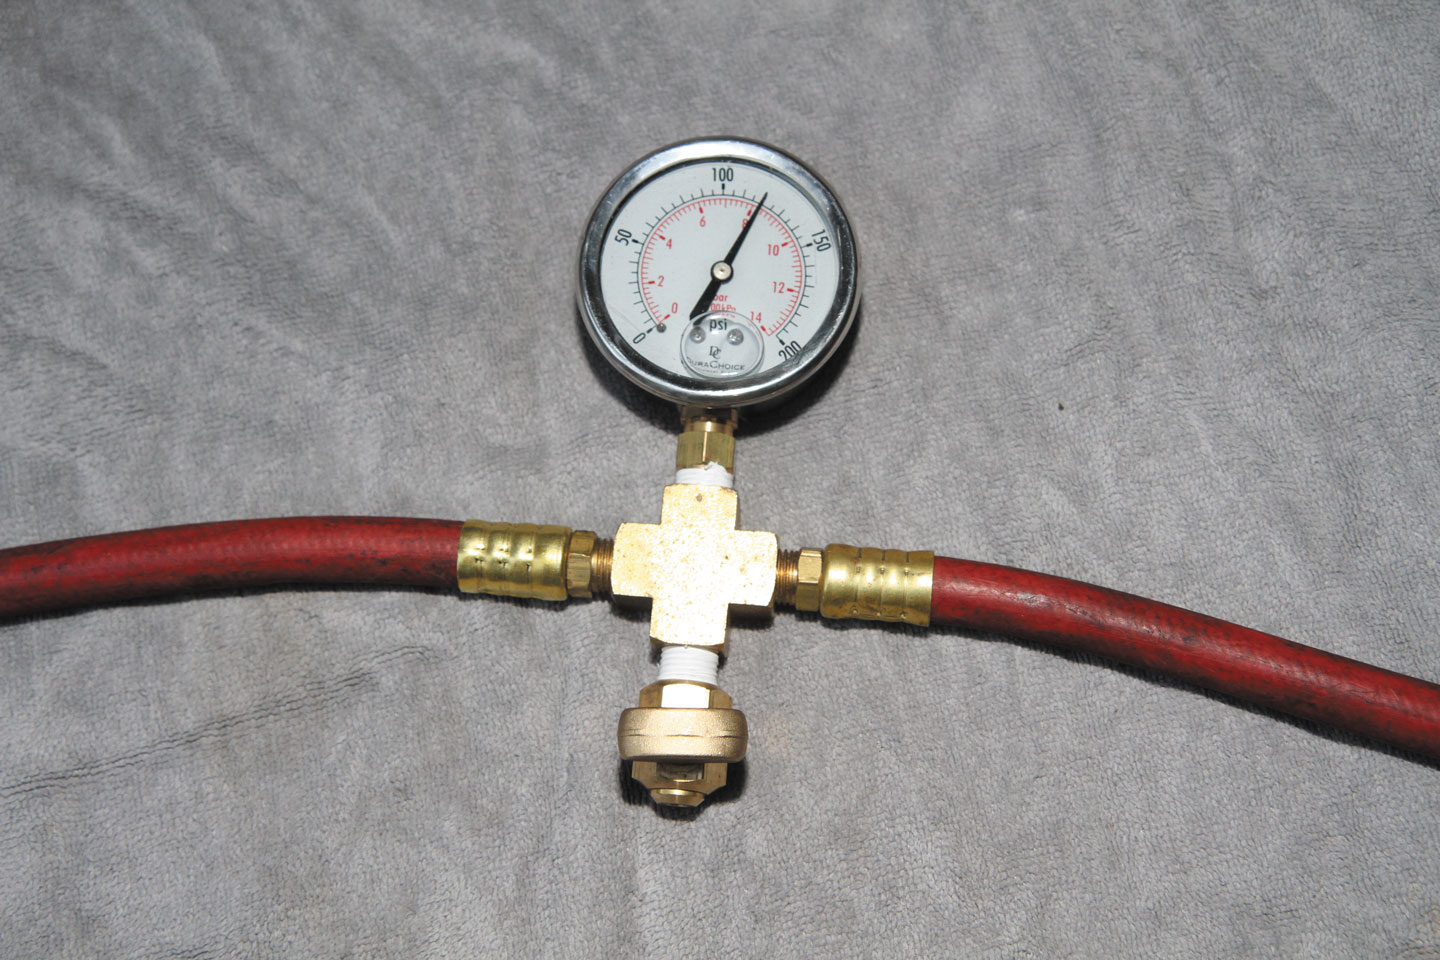
The tire inflator tool was made using inexpensive parts, including a glycerin-filled 200-psi pressure gauge, a brass quarter-turn drain valve, and hose connections.
Many Type A motorhomes require fairly high air pressures in the tires, which can pose a challenge when inflating them. Ideally, the RV’s onboard, engine-driven air compressor would handle the task by providing filtered, dry air, which is beneficial for tires. But depending on the compressor’s governor and how it’s set, airflow may cut off at approximately 125 psi and not begin pumping again until the pressure drops to about 105 psi. That won’t matter if the tires require 100 psi or less. But if higher pressures are called for, it can take what seems like forever to get those last few psi in a tire.
Before we look at solutions to this problem, it’s important to emphasize the need to inflating RV tires to the proper pressure. Tire life, performance, vehicle handling, and safety all depend on it. For a detailed discussion of how to determine the correct air pressure for tires, see “Maximizing RV Tire Life” (April 2017, page 50).
Once the required psi is determined, one method for filling tires is to add as much air as possible, and then enter the cockpit and fan (that is, repeatedly pump) the brake pedal to drop the pressure and engage the compressor. As the pressure builds, listen for the air dryer to make its distinctive sound — psshh — which occurs when the air compressor’s governor reaches the maximum cutout pressure and sends a signal to the air dryer to perform a brief purge of any moisture. That “psshh” sound can be heard every now and then. Once you hear it, use the tire filler to add more air. After about 10 to 15 seconds, the pressure in the air tank will lower to the point where it is equal to the pressure in the tire, and you can no longer add more air. In fact, if the coach’s air pressure drops even further, the tire may even lose some air (although that is not likely if the system contains a check valve). Then, return to the cockpit, fan the brake pedal a bit, and go back outside to listen for the “psshh” when the air dryer purges. Add more air, repeating this process, repeatedly checking tire pressure with a gauge until the tire reaches the desired pressure.
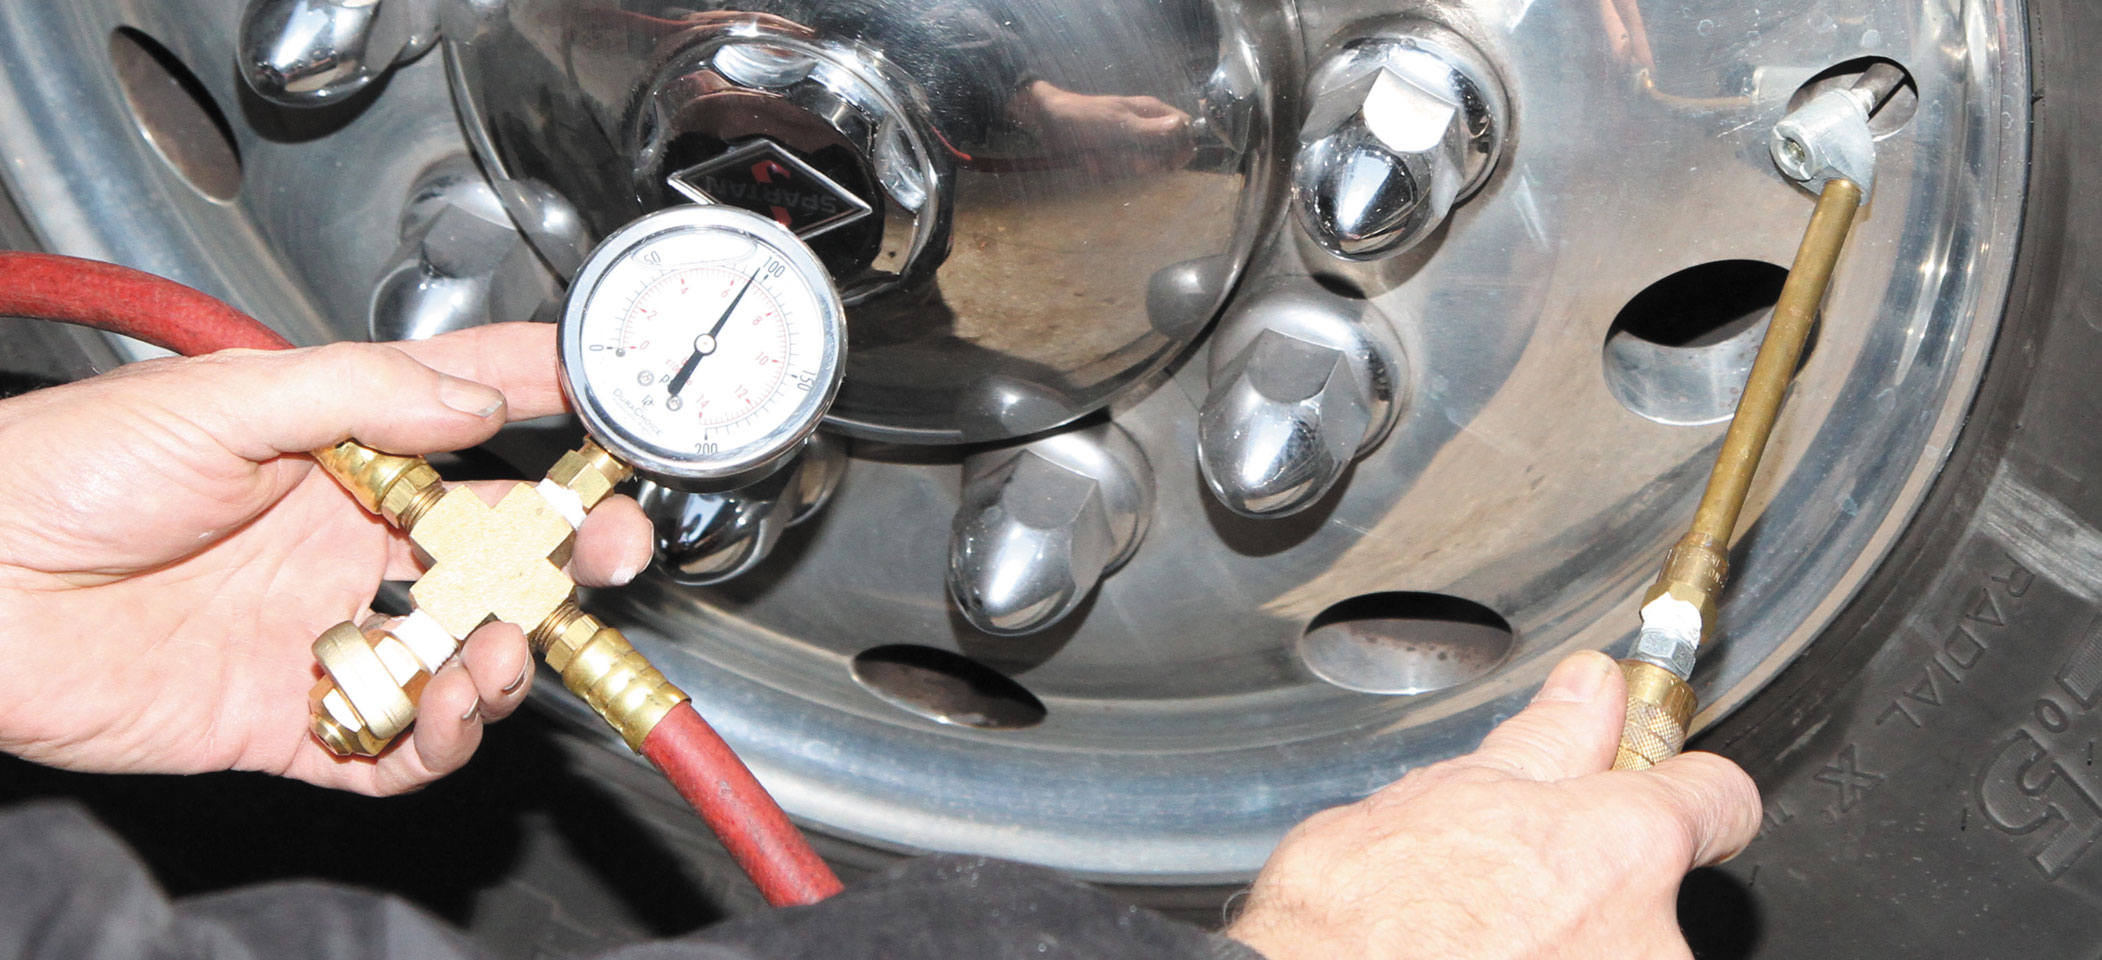
With an air hose plugged into his motorhome’s auxiliary air connection, the author fills a tire using the inflator tool he made.
This process can be eliminated in a few ways. One is to add an air multiplier that will increase the air pressure up to double the line pressure so that tires can be filled easily. Although effective, this method is not inexpensive. A second option is to buy a small electric portable compressor that builds to 150 psi or more. An example is VIAIR’s 450P-RV Automatic Compressor (www.viaircorp.com/portables/450p-rv-auto). In this case, you are no longer using dry, filtered air to fill the tire, and some basement cargo space must be sacrificed to store the compressor.
What follows is a description of a third, less expensive method that relies on a simple device that many RVers can make themselves. It can remotely monitor the motorhome’s air pressure and control the compressor governor.
First, I bought a brass cross fitting (similar to a tee fitting, but with four ports instead of three) with ¼-inch pipe thread. I then added a high-quality glycerin-filled 200-psi pressure gauge to one of the ports in the cross. Any pressure gauge will do, but I chose the glycerin-filled gauge because it’s durable and will retain its accuracy over time. Opposite the gauge, I inserted a brass quarter-turn drain valve with male pipe threads on one end.
I then obtained a 3/8-inch air hose and cut it so I had two hoses, each 2 feet long. The next step is to crimp into the fresh-cut open ends of the hose a pair of 3/8-inch hose barbs with ¼-inch male pipe thread, so you have two short hoses with ¼-inch pipe thread on each end. Because of the high pressures that the hoses will be subjected to, I recommend crimping a brass ferrule instead of using worm-drive hose clamps. If you do not have the proper crimping tool, ask a professional shop to make those connections for you. If you can find premade 2-foot-long hoses, you won’t have to cut the 3/8-inch air hose, but you also could eliminate the input hose and just screw the male coupler plug directly into the brass cross fitting, if desired.
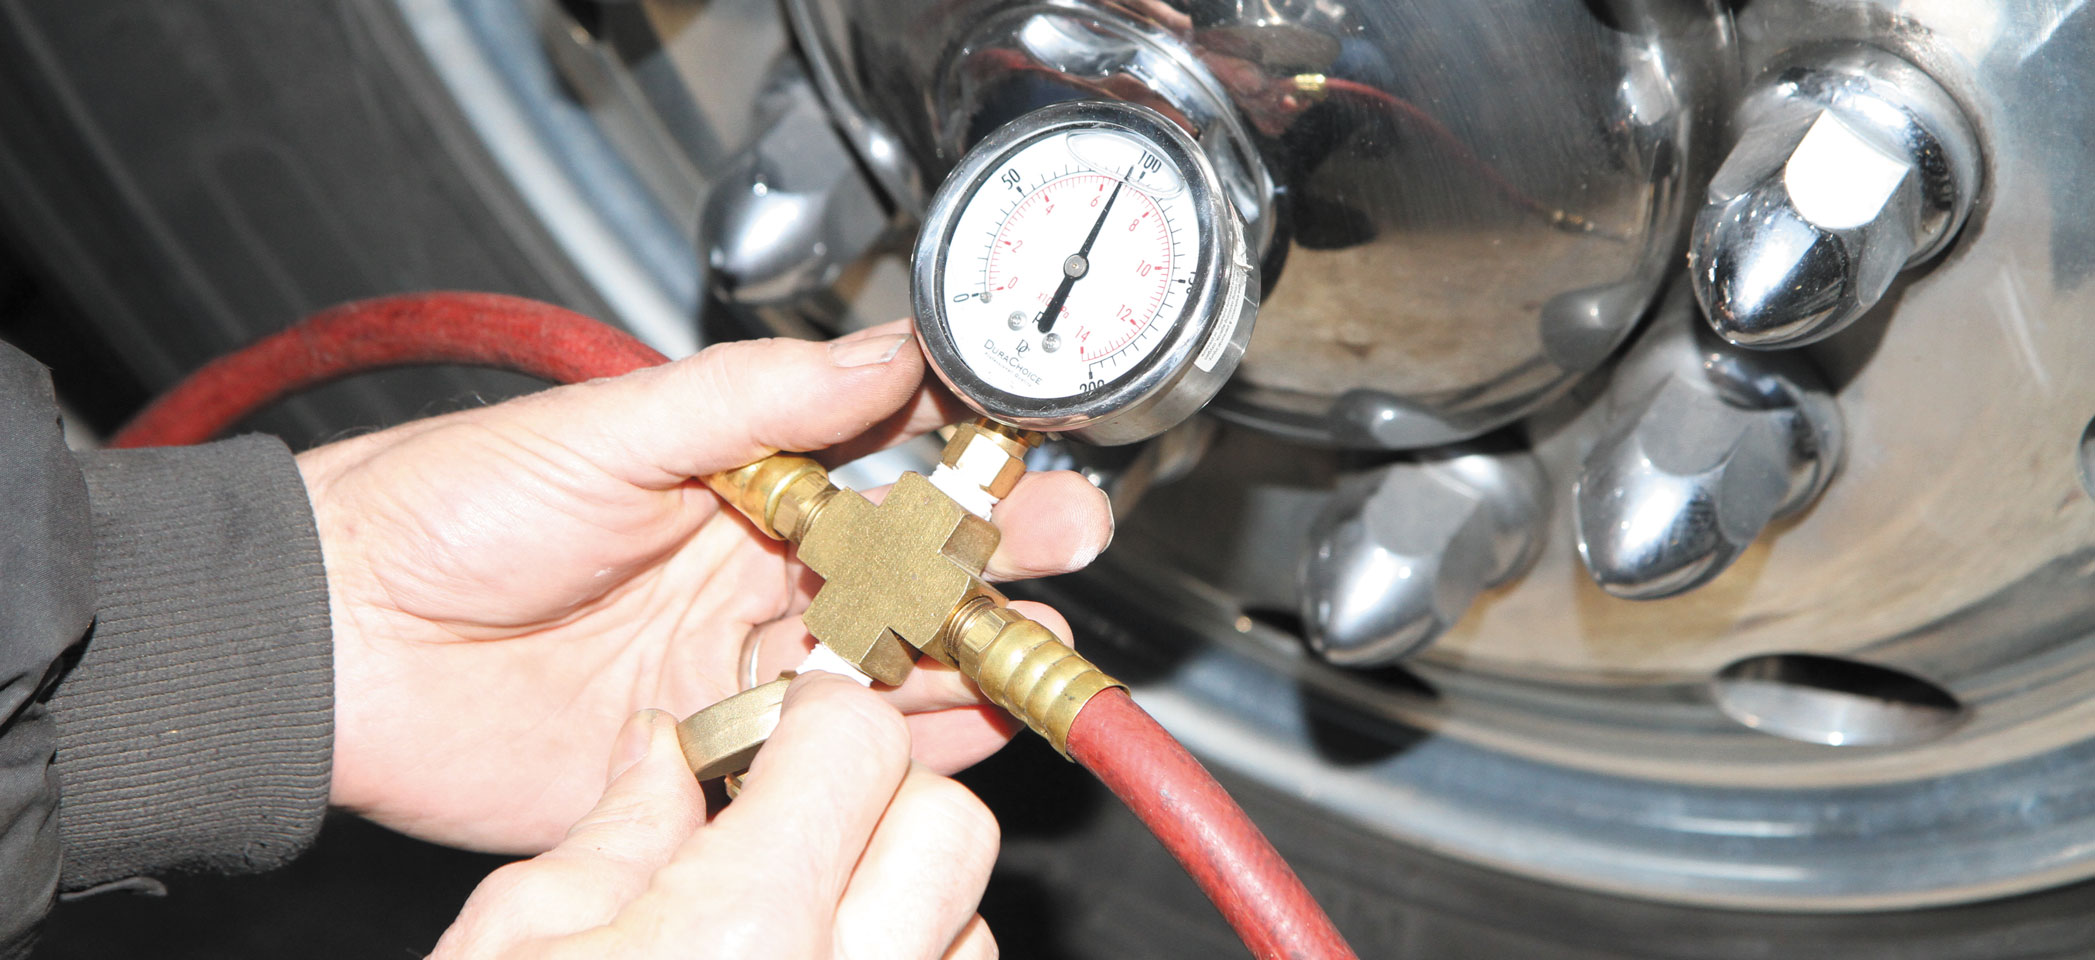
The author opens the tire inflator tool’s drain valve to lower the air tank pressure to a point where the gauge indicates the air compressor governor is kicking in.
Next, I threaded one end of each hose into the brass cross fitting. I added a male quick-disconnect coupler plug to the end of one hose and a female coupler body to the other. Both couplers had ¼-inch female pipe thread, and I was sure to match the coupler style to what was already in use on the motorhome’s auxiliary air supply connection. I also wrapped Teflon thread tape around the fittings and gauge threads to make a tight seal.
The device must be leakproof when you use it. A leak will be immediately noticeable; correct it before continuing.
Using the tool is easy. I plug my 50-foot air hose into the motorhome’s auxiliary air connection. I then plug the tool into the end of the hose and insert my tire filler into the tool’s female coupler body. I start the engine to run the compressor and move the tool to the tire that I want to fill. I use my tire pressure gauge to determine how much air I must add. Once the tool’s gauge indicates that I have plenty of air pressure, I begin to fill the tire. When the line pressure drops to a point where it is approaching what was already in the tire, I stop filling. I open the drain valve to bleed off some air pressure to a point where the gauge indicates that the compressor governor is kicking in again. Once the gauge reaches 125 psi, I use the tire filler to add more air to the tire. Generally, this must be repeated one more time to reach the 120 psi that my steer tires require. (Again, you must determine the proper pressure for your tires.)
The tool’s dial gauge provides instant information about the available line pressure, and the drain valve eliminates having to run in and out of the motorhome cockpit to cycle the compressor, saving me time and aggravation. The tool is easy to make, and the inexpensive parts are available at most auto parts, hardware, and home improvement stores. It takes up little room in a tool kit. It uses the dry, filtered air from a motorhome’s air supply, which is always available. And it can make your life just a little bit easier.