
This handy device performs a variety of electrical measurements, making it an indispensable item to carry on board an RV.
By Mark Quasius, F333630
September-October 2025
While a multimeter can function as a voltmeter, and is often used expressly for that purpose, the device is quite versatile and can perform a variety of electrical measurements. That’s why every RV owner should carry one in their RV tool kit. On most multimeters, voltage, current, resistance, and even temperature measurements can be obtained just by turning the dial to the correct setting. With some models, pressing a button toggles through the available modes.
Most multimeters can check 12-volt-DC battery voltage on an RV, as well as 120-volt-AC voltage at a campsite pedestal. In addition, a multimeter can help the RV owner to look for blown fuses and test bulbs for continuity; measure voltage drop within various circuits; verify faulty cable connections; and test heating elements. Some meters can display current draw, measured in amps.
Be sure to read the owners manual thoroughly before using a multimeter, and follow all safety precautions. Safety is paramount when making electrical measurements. If you lack the necessary skills or don’t feel comfortable, it’s best to seek help from a professional.
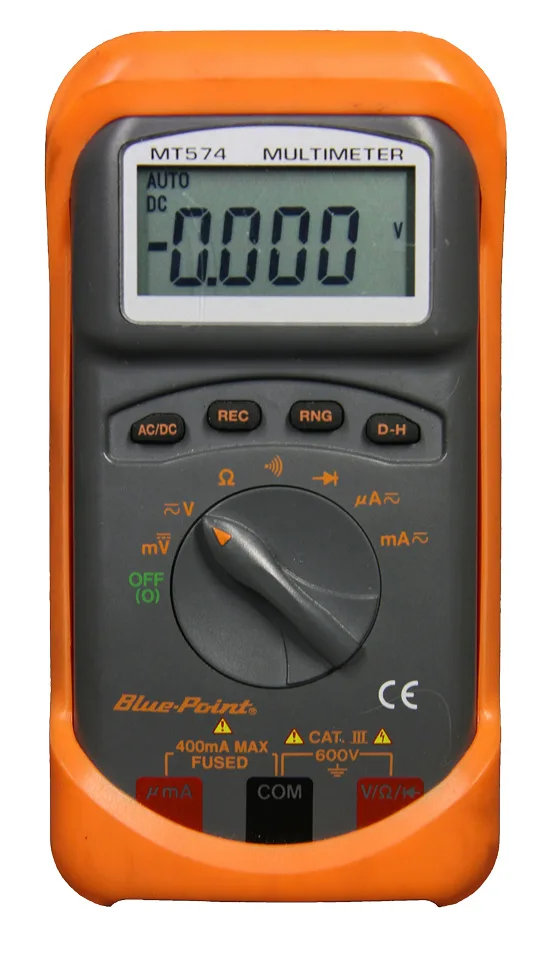
Reliable, accurate multimeters used to be a bit expensive for the occasional user, but prices have come down, so some amazingly affordable models are available now. Most are offshore imports, but they perform well and deliver accurate readings. These models come in either analog or digital versions. Analog meters feature a traditional dial and needle- type movement. Digital meters utilize LCD or LED displays. Except for a few specific measurements typically performed by professionals, analog meters are largely obsolete thanks to more accurate and precise readings provided by digital meters.
Voltmeter Function
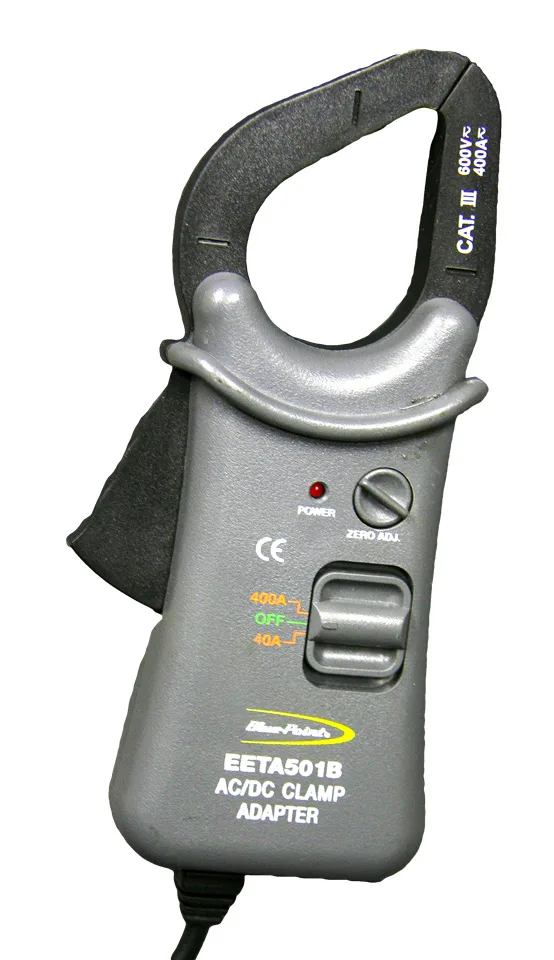
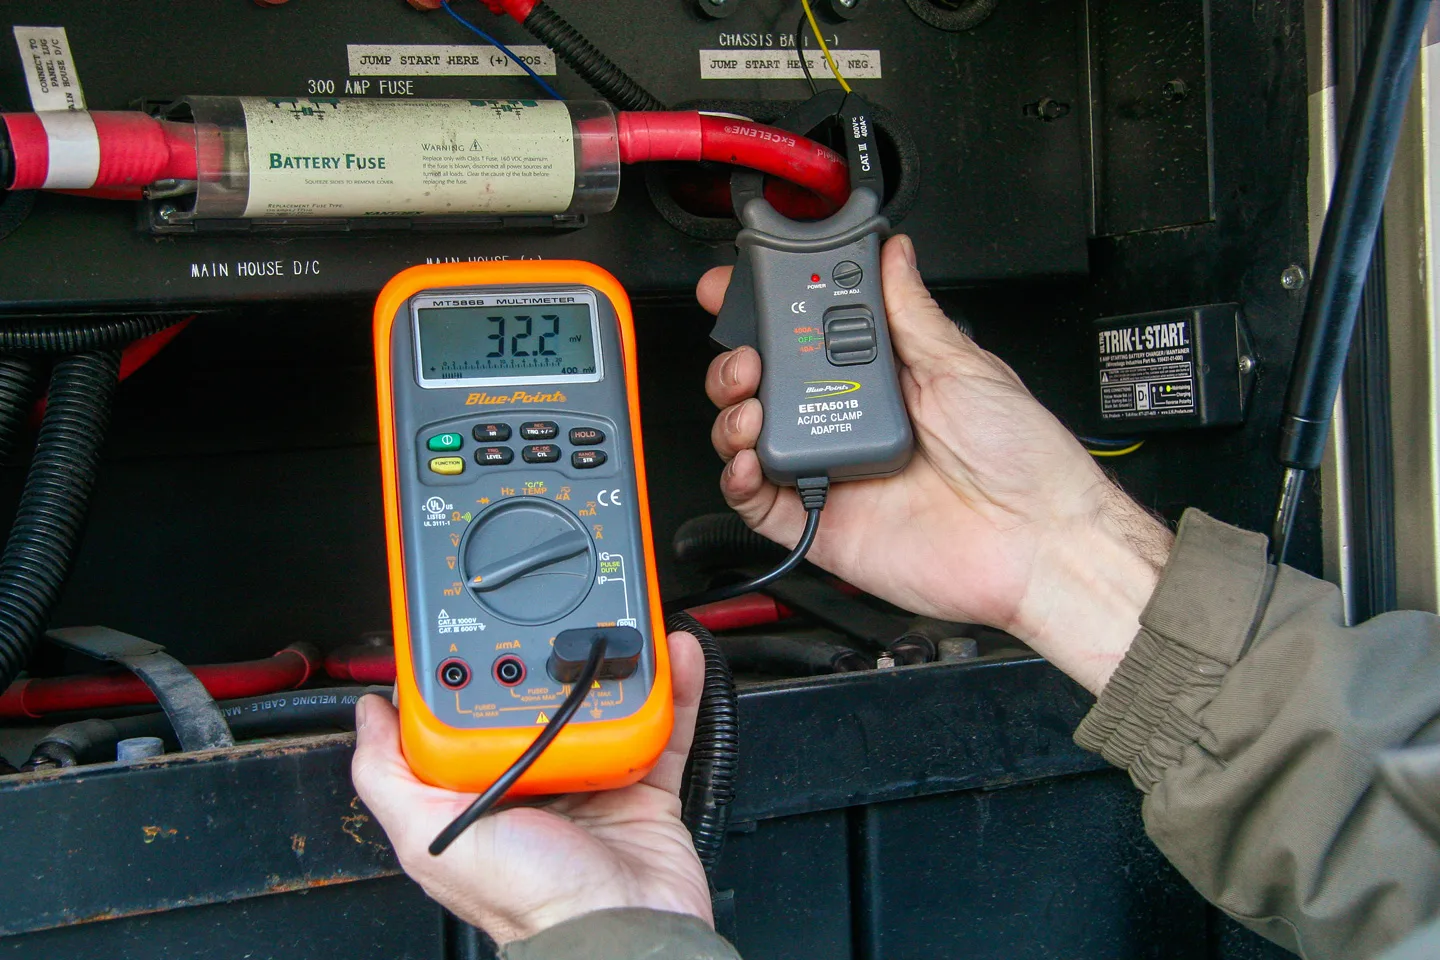
Helpful accessories include a clamp-on ammeter to measure current loads greater than 10 amps.
It’s easy to measure voltage using a multimeter. Simply turn on the unit, switch it to either the AC or DC voltage setting, touch the probes to the connections at the battery or the electrical device being measured, and read the display.
Some meters offer an “auto range” feature. Those that do not include this function require the user to select either AC or DC voltage and then pick a voltage range, such as 0-20 volts, 0-100 volts, 0-1,000 volts, etc. When equipped with “auto range,” the meter automatically compensates for the incoming voltage level, but the user still must set the type of voltage — AC or DC — to measure. “Auto range” prevents potential damage to the meter and simplifies the use of the device.
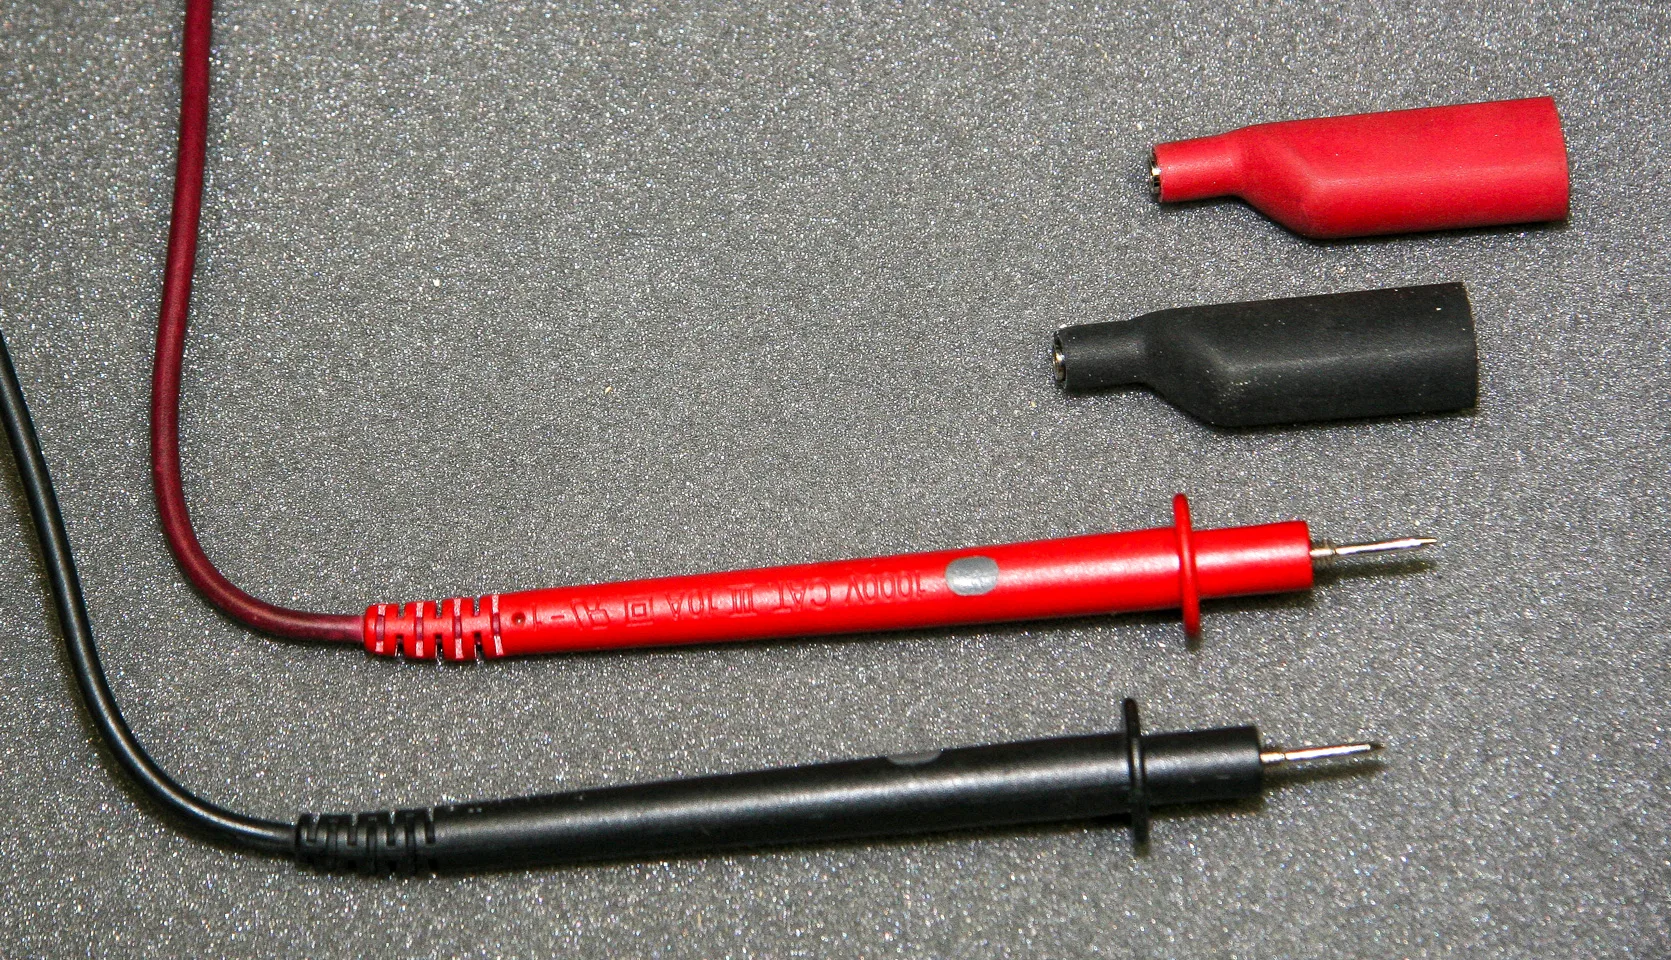
Helpful accessories include screw-on alligator clips.
Accessories sometimes can be added to a multimeter to extend its capabilities. Many meters can accommodate a clamp-on ammeter probe or a dual-probe digital temperature adapter, eliminating the need to buy a meter for each different task. Keep in mind that less expensive models probably won’t have this capability.
Current Draw
Testing for current draw is another use for a multimeter. Most can measure current flow using the existing probes; however, this generally is limited to no more than 10 amps. To measure higher amperage, you’ll need a clamp-on ammeter accessory. It measures the current flow of a single conductor by picking up the magnetic field around the conductor.
Note that a clamp-on ammeter attachment isn’t as accurate as a conventional ammeter and can be tricky to calibrate. Plug the current clamp into the multimeter’s input jacks, replacing the probes used for the other measurements. Next, adjust the dial to zero out the meter so that it can read the small signal from the current clamp, convert it to the proper amperage, and display it on the multimeter’s screen. I’ve found that this can vary quite a bit between samples, and you constantly need to recalibrate the clamp adapter.
My personal preference is to purchase a dedicated current meter with its own built-in clamp. Most of these models also are equipped with probes and give you the ability to measure voltage and resistance. If you plan to check current draw, I’d recommend purchasing a self-contained combo unit that handles all these tasks.
Keep in mind that any ammeter can measure current flow only on a single conductor. If you are measuring battery current, that’s easy, because you just find the battery cable and place the clamp on that cable to obtain your measurement. The same holds true for inverter, engine alternator, or any other 12-volt-DC circuit.
Checking 120-volt-AC current is a different matter. In most cases, you cannot access a single conductor. Simply clamping your ammeter around your power cord won’t work, because the AC current is flowing back and forth across multiple conductors, and you will not get an accurate reading.
For AC circuits, you need to find a single conductor to clamp onto. It’s possible to do this inside a campsite pedestal, but that’s not a task for the average RV owner, given the dangers associated with high voltage — not to mention that campgrounds would not approve of this. (Note that current and voltage readings require the circuit to be energized, whereas resistance readers require the circuit to be de-energized.)
Instead, this task requires a breakout adapter, which separates the conductors so that the ammeter can be clamped onto a single conductor. Many are available with a 120-volt 15-amp plug and receptacle. The user simply unplugs the cord of the device being measured from the outlet, inserts the male plug of the adapter into the outlet, and then plugs the cord into the female end of the breakout adapter. Clamp the meter around the adapter to obtain a reading.
This is fine for 120-volt 15-to- 20-amp circuits but not for larger pedestal circuits. For 30-amp shore power, a pair of 15-to-30 and 30-to- 15 adapters can be used to test the 120-volt feed; however, this won’t work for a 120/240-volt 50-amp shore power feed. That requires an adapter that separates the L1 and L2 lines individually from the neutral wire.
Pedestal Voltage
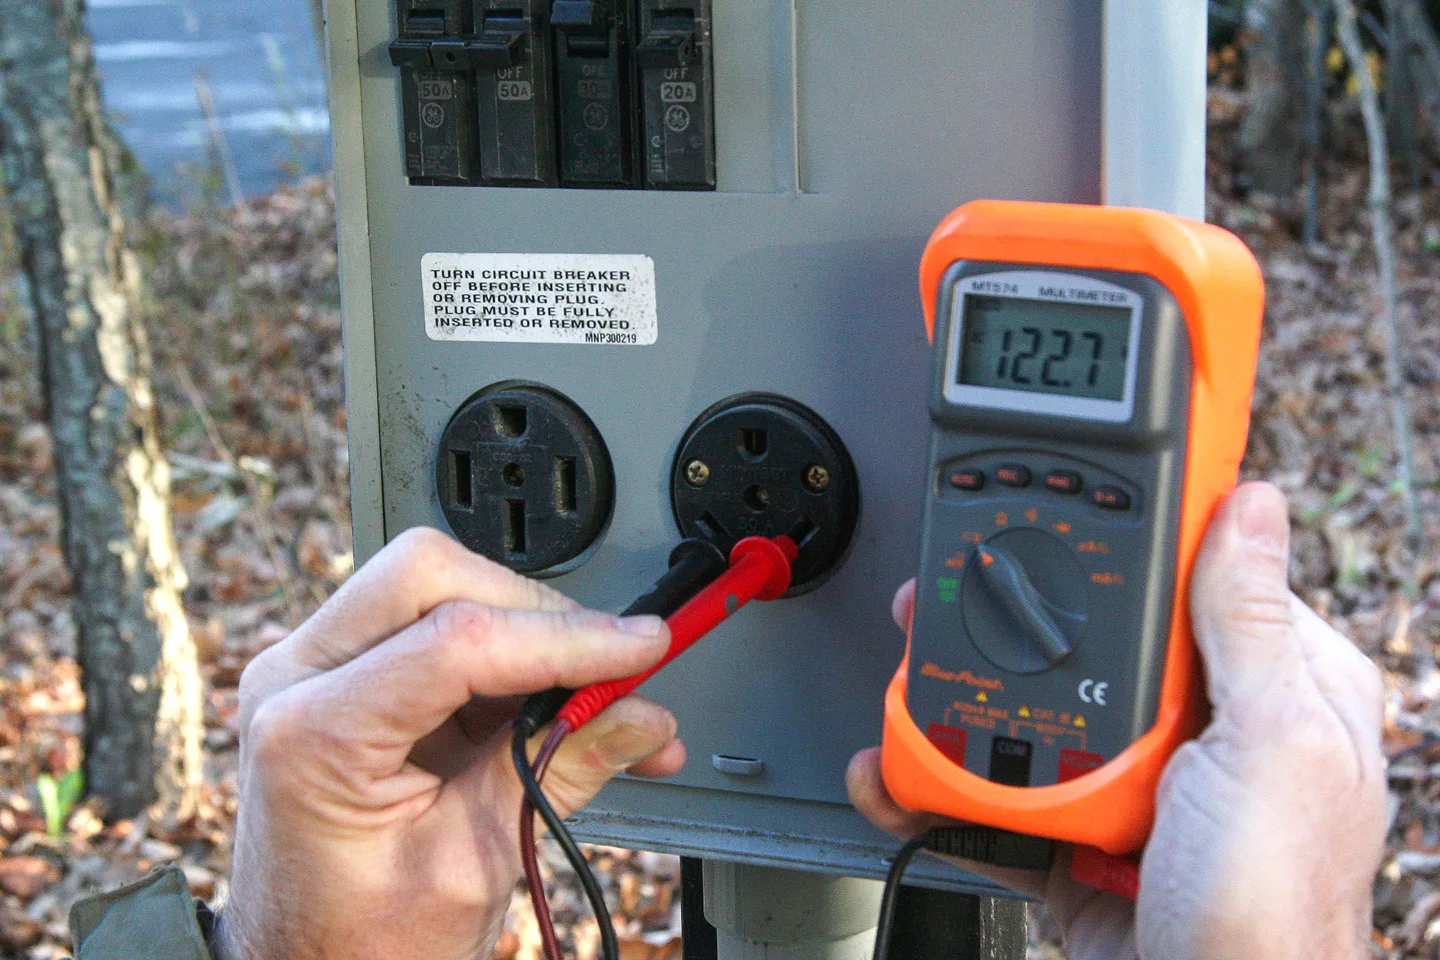
Using a multimeter to test the campground pedestal voltage before plugging in will help to prevent damage to your RV’s electrical system.
One of the most common tasks for an RV owner is to check the campground pedestal voltage prior to plugging in the RV. Twenty-amp or 30-amp RV pedestals use a three-wire receptacle. This means there will be a single hot pole, a neutral wire, and a ground wire. When the multimeter is set to AC voltage, you can test for proper pedestal voltage by inserting the red probe into the hot terminal and the black probe into the neutral terminal; then, insert the red probe into the hot terminal and the black probe into the ground terminal. In both cases, the reading should be 120 volts.
A pedestal with 50-amp service has a four-wire receptacle. In addition to the neutral and ground wires, it has two hot poles, commonly labeled L1 and L2. When testing either of these hot poles to the neutral or ground, it should measure 120 volts. When testing one hot pole to the other, the measurement should be 240 volts.
The safe incoming voltage range for all RVs is 120 volts AC, plus or minus 5 percent. If the voltage is not within tolerance, do not plug your RV into that pedestal.
Battery/Charging Systems
A multimeter can be used to check current draws as well as alternator or battery charger output.
Fully charged batteries at rest should measure at least 12.7 volts; healthy RV batteries should be between 12.4 and 12.8 volts. If not, you may need to isolate the batteries from each other and charge them individually, then test to see which battery is drawing your battery bank down. Note, however, that it’s generally not recommended to replace just one battery; when one is weak or has failed, you should replace them all.
With the charging system running, you may see in excess of 14 volts while bulk charging, or somewhere around 13.2 volts if in float mode. If you constantly need to add battery water, odds are good that the charging system is putting out too much voltage, most likely during the float mode. If so, the charging system may need to be serviced or replaced.
Parasitic Loads

A commercially available 120-volt breakout box is necessary to test for current flow amperage.
If your RV loses battery power while parked, you may have a current draw someplace that needs to be addressed. Every RV has certain parasitic loads. Motorized RVs especially have draws on the chassis battery associated with the engine and transmission electronic control modules. Clocks, propane leak detectors, and radio memory power supplies also create parasitic loads on batteries in RVs. If you suspect that something else is drawing too many amps when the RV is parked, you can use your multimeter to test for this.
Set the multimeter to the amps position, remove the positive or negative battery cable, and insert the multimeter probes in-line between the battery cable and the post. If the current draw is significant, remove fuses from the various circuits to determine where the draw is. This will help to narrow the search to a handful of components. If you want to check larger current loads, such as alternator output, battery charger output, or inverter draws, you’ll need to use a clamp-on ammeter attachment.
Voltage Drop
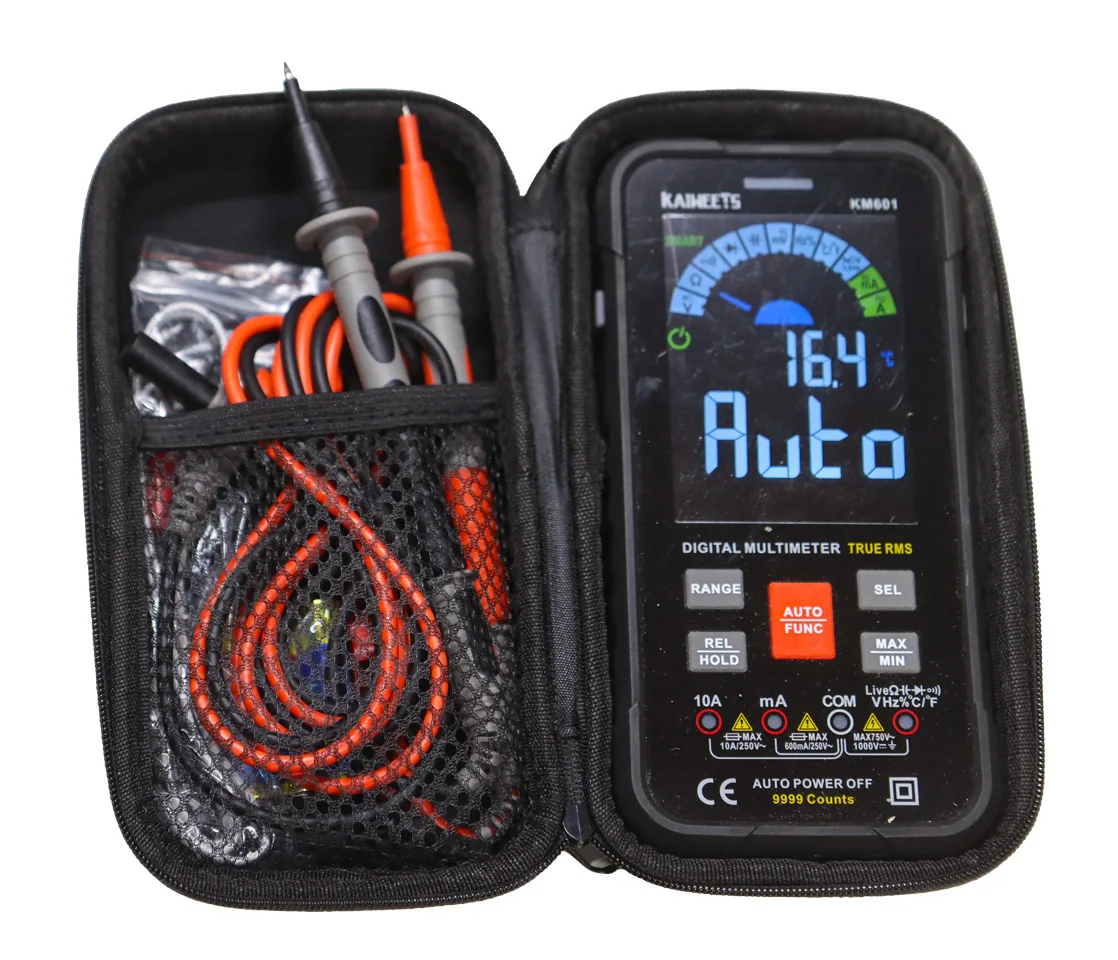
Some multimeters come with a case to protect the device and for carrying related accessories.
Battery cables and wiring sometimes suffer from failed or faulty connections. A terminal connector may have a bad crimp, a wire may have pulled out of the connector, or corrosion may be affecting the ability of the wire to carry current. By placing one meter probe on one end of the wire and the other probe on the far end of the wire, you will be able to determine the voltage drop (i.e., loss) as the current passes through the wire. A meter reading of 0.2 volts is acceptable, but a reading of 2.5 volts or more indicates a serious voltage loss in that cable. By checking the entire run, and then narrowing it down to smaller segments, you’ll be able to determine which cable segment is bad.
Precise measurements of voltage drop depend on the length of the run and the size of the conductors. In some cases, advanced diagnostics may be beyond the scope of the typical do-it-yourselfer. When in doubt, contact a certified RV technician.
Diodes
Diodes act as electronic check valves — they allow current to pass in one direction but not the other. Some multimeters have a diode test setting that gives you a quick go or no-go readout. If your meter does not have a dedicated diode test setting, you can check the diodes using the resistance function. However, in most cases the diode must be removed or partially isolated from its circuit to be tested in this manner.
To test a diode, place the probes on each end of the disconnected diode and observe the reading. Then reverse the probes and check that reading. A good diode should show resistance in one direction and no resistance in the other direction. If the meter gives you a reading in both directions, the diode is shorted and has failed.
Fuses
If the fuse is in the holder and the circuit is powered, you can use the DC voltmeter setting on the multimeter to test it. You should have power at the input side of the fuse. If the fuse is good, it will have power at the output side as well; however, a blown fuse will have power only on the input side. For circuits that are not powered at the moment, you can remove the fuse from the fuse holder and test the fuse using your meter’s resistance function. You should have continuity when you place your probes on each end of the fuse.
Heating Elements
To test a heating element, first be sure you can measure 120 volts at the heating element connection. If voltage is present but your water heater just isn’t getting very warm when in electric mode, disconnect the power from the heater and remove the wires from the heating element. Check the water heater literature or consult with the manufacturer to find the unit’s rated wattage and then divide that number by 120 volts to determine the amps the heater normally draws. Next divide 120 volts by the amperage to calculate the normal resistance of the heating element.
Remove power from the element first, and then set the multimeter to the resistance mode; measure the resistance by placing the probes on the two wiring terminal connections. If the heater element is in good shape, the reading should match or be very close to what you calculated.
The goal of this article is to give you a better understanding of multimeters and how to utilize them in an RV application. As noted, it’s definitely one device that should be in your toolbox. You don’t have to spend a fortune to purchase one that is reliable and accurate. If you find a great bargain someplace other than the big-name brands, it’s a good idea to check some user reviews for that model before buying.