
Dear RV Doctor:
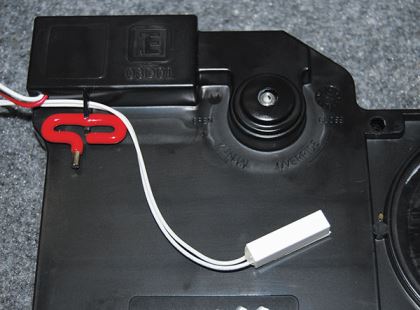
My shower/bath sink (gray water) waste tank is full. My electrically operated dump valve isn’t working, so I can’t dump the contents. Is there a way to operate the valve manually? If so, I’ll just leave it open for the rest of our trip. When I push the button to operate it, it makes a buzzing sound, but the valve never opens.
Dennis Frederick
Via email
The short answer is yes; every electric gate valve I’ve seen has some type of a manual override feature. As an example, the electric valve produced by Drain Master ships with a hex wrench mounted right on the valve.
The first thing to check, however, is the supply voltage and the circuit grounding. Make sure the battery system is in good working order and the battery bank is charged. If it is indeed a stuck motor or fouled gearing, the dump valve likely will have to be replaced. You didn’t state the brand of RV or valve, but this would apply to virtually all of them.
It’s okay to leave the valve open temporarily while the sewer hose is connected, but if you are traveling and you run water during the day, you must close it or else you’ll have gray water pouring out as soon as you take the cap off the termination assembly. It’s best to order a replacement as soon as possible. I believe you can get next-day shipping if you contact Drain Master directly at (877) 787-8833.
If you have a different brand of gate valve and can’t find the documentation, the instructions for manual operation probably can be found on the manufacturer’s website.
Dear RV Doctor:
I have a 3-year-old coach with two opposing slideouts and a third slideout for the queen-size bed. The RV is used about seven to 10 times a year, plus it’s been on two weeklong trips. It is always stored in my pole barn when not in use. This past summer, I felt a spongy spot on the main fixed floor. The spot is between the stove and the refrigerator on the main floor, not the slideout floor. It’s directly in front of the spice rack. It extends from the spice rack to about halfway toward the island.
My dealer inspected the RV. The water system was pressure-tested and no leaks were discovered. Exterior seals did not appear to be suspect. The service tech had no choice but to cut into the floor to find the source. He found no signs of water stains or mold. He commented on the smell of a chemical and the appearance of delamination.
I did not get an extended warranty, so I don’t know what my recourse is with the factory. If they can cut the “bad” section out and replace it, will this be the end of my problem, or can I expect a total floor failure?
John Sixx
Via email
The photo you sent definitely shows a separation of the flooring layers — a delamination. It sounds like your technician did a good job of exposing the void in the floor assembly. The odor he noticed is likely the off-gassing of the glues, solvents, and chemicals within the material. Without evidence of moisture intrusion, it looks like the flooring simply deteriorated from use. That portion of your coach is sure to receive a lot of foot traffic. Perhaps a higher quality of flooring would have been a better choice for the manufacturer, but then again, that may have pushed the retail cost up another price point. I doubt there would be any positive recourse with the manufacturer. Most components are warranted for one year.
It’s hard to tell the exact type of fiberboard, but as long as there are no apparent water leaks from within the coach or from an outside breach, my suggestion is to overlay the entire floor with another layer of plywood. First, be very sure there is no moisture or mold inside the floor.
Another layer of quality plywood attached directly to the old flooring likely will last the rest of the RV’s usable life. A competent RV service tech can perform that service. I would cover the entire floor, not just where your technician cut the opening. A transition strip will have to be made to a tile or linoleum section (if so equipped), since the added layer now will be slightly taller. Obviously, it will be necessary to remove all the carpeting first. And depending on how low the cabinet doors are hung, they may have to be modified or raised. Also, if you choose this overlay method, make sure the technician carefully checks the movement of all slideouts. Raising the overall floor height may require special attention to the slide room clearances.
If you really like this particular coach and plan to keep it awhile, I feel this is your best course of action.
Dear RV Doctor:
The TV in my RV came with a Winegard antenna. The TV has a single coax connector on the back that can detect TV, CATV, CADTV, and DTV signals. Currently, I connect the television directly to the Winegard antenna coax. Two other coax connections in the coach are just below this connection — a cable coax and a satellite coax connector. When I am in a park with cable TV, I switch cables at the back of the television to select the correct input.
My question: Can I connect the Winegard and the cable TV lines to a splitter so that there is a single cable plugged into the rear of the television? I’d rather not have to switch cables. Or, do I need to use an A/B switch and keep the signals separated?
Mike Pardina
Via email
Winegard antennas basically are wired inline with the RV cable input. In other words, you do not have to switch the coax on the back of the TV between your cable and Winegard antenna, as a single coax will provide both inputs.
The accompanying illustration shows the back of a Winegard wall plate (which includes the powered amplifier unit). Your wall assembly may differ slightly but should have similar connections. The “downlead” comes directly from the Winegard antenna on the roof. The “cable input” is self-explanatory and originates at the cable jack on the exterior of the RV. The “set 2 output” connects the coax of a second TV, if you have one.
The single coax connection on the front of the wall plate should connect directly to the main television. When the power switch on the front of the wall plate is turned on, it activates the Winegard power amp and switches off the cable input so the antenna is the only source feeding your TV. When the power switch is turned off, the cable input is switched back into the circuit and is directly fed to the television so the antenna is bypassed. A dedicated splitter usually is not needed, as the wall assembly serves the same purpose.
Generally the “satellite” coax is wired in the coach separately and is not part of the Winegard setup. This normally requires additional wiring components; possibly a splitter. But I suspect your cable coax connector may be attached to the “TV 2” connection on the Winegard wall assembly, and the main Winegard coax connector you are using is properly switched through the wall assembly.
You might remove the wall assembly and inspect the rear to see whether there is a coax attached to the “cable input” connector. If so, it’s possible to use a single coax cable as described above. If not, you have a few options. You can’t use a regular passive splitter, but you can use one that allows you to switch actively between the inputs. Though the antenna input won’t cross-feed onto your input signal when you are using cable, because of the amplifier being turned off, the cable input will cross-feed onto your Winegard input. If you use a satellite signal often, it might be beneficial to add a splitter, separating the satellite input from the cable input.