
Air conditioners and heat pumps work similarly, so maintenance and troubleshooting are similar as well.
By Steve Froese, F276276
November 2023
I spent a few months discussing refrigerator cooling unit replacement in this column, so I thought I would stay on the topic of refrigeration appliances and talk about air conditioners. In this series of articles, I will cover simple troubleshooting of rooftop air conditioners and heat pumps.
There are several possible failure modes for air conditioners and heat pumps, and some of them can be repaired as a simple DIY project. In fact, many causes of RV A/C failure can be easily remedied, but they require the owner to go on the roof. Rooftop maintenance is advised only if you feel capable and comfortable doing so; if not, seek the assistance of an RV repair technician.
In this article, we will cover troubleshooting in order of difficulty and likelihood. While other possible causes exist for these issues, I will discuss the most common ones here.
Instead of delving into the theory of air conditioner operation, here’s a simple explanation. An A/C unit removes hot air and humidity from inside the RV and replaces it with cold air. Hot air and moisture are expelled to the outside. A heat pump works the same way, except it incorporates a reversing valve that literally reverses the process. In the case of a heat pump, the cold air inside the RV is replaced with the warmer air caused by the hot refrigerant running in reverse flow through the system.
The main components of a heat pump are the evaporator, condenser, refrigerant, compressor, blower fan, reversing valve, control board, wall thermostat, and start and run capacitors. Many of these components are relatively maintenance-free, and others can be easy to troubleshoot and replace.
While it was common many years ago to have an RV rooftop A/C unit recharged by an HVAC technician when it became low on refrigerant, this is extremely rare now. If the refrigerant leaks out, replacing the entire air conditioner or heat pump is generally the only option. So, as a result, we will not include low refrigerant in the list of repair steps. Fortunately, it is rarely the cause of air conditioner/heat pump issues, except in the case of very old units. Diagnosing this is difficult in the absence of cutting into the closed system with a set of manifold gauges.
Let’s first examine failure modes and likely causes. Most of these steps apply regardless of whether you have a heat pump or an air conditioner. I will discuss the differences as they arise. In addition, we will not assume the wall thermostat is faulty, as this is extremely rare. We will also ignore issues related to incorrect wiring, installation, etc. While the specific information in this article pertains to Dometic units, all air conditioners work on the same principle and generally consist of the same components.
If your rooftop unit fails to turn on — no fan and no compressor — you should suspect either a bad 12-volt-DC or 120-volt-AC power source. Check your fuses and circuit breakers, and, of course, make sure you have power in your RV. It is also important to ensure the wall thermostat is set to a temperature that would demand cooling (or heating, in the case of a heat pump). In other words, if it is 68 degrees inside your RV and you set your A/C to 70 degrees with the fan on “Auto,” the A/C will not start, as the thermostat would not call for cooling at that ambient temperature. So, it is important to make sure settings on your wall thermostat are commensurate with the environment you are trying to create in the RV before assuming your A/C has a problem. When I refer to the wall thermostat, in most cases it doesn’t matter what model thermostat you have or even if you don’t have ducted air. The same principle applies to ceiling controls.
If the fan operates but the compressor does not start, the issue could be low power, a faulty wall thermostat, or a failed compressor, although the latter two are less likely. You can generally tell when the compressor is running, as you probably will hear a soft humming noise and the air will turn cold (or hot in the case of heat pump operation). Note that the fan will come on without the compressor if the thermostat is set to “Fan Only‚ or if you have the fan speed set to anything other than “Auto‚ and the thermostat is not calling for cooling.
If the compressor tries to start or runs only for a short time, cycles off, then hums or blows a circuit, I would suspect one or more of these is faulty: the capacitors, the positive temperature coefficient re-lay (PTCR), or the resistor start relay. As mentioned earlier, regardless of the failure mode, it is important to ensure that you have reliable 120-volt-AC power in your RV. Bad AC power can cause a variety of problems with your 120-volt appliances. If your heat pump blows hot air while in cooling mode, a problem likely exists with the reversing valve. If your compressor runs but the fan does not, the issue probably is with the blower motor or run capacitor.
Always ensure your air-conditioner inlet filters are kept clean. Most filters can simply be hand washed with dish detergent and left to completely dry before reinstallation. Also, make sure the wall thermostat or remote temperature sensors (in the case of multi-zone systems) are not blocked or exposed to external temperature sources such as fans or direct sunlight.
One of the common themes listed here is a failure of the start and/or run capacitors. These capacitors provide the higher current required to start and run the compressor and blower fan. Fortunately, they can be tested and easily replaced. If the blower motor or compressor is not working or is short cycling, test the capacitors and replace if necessary.
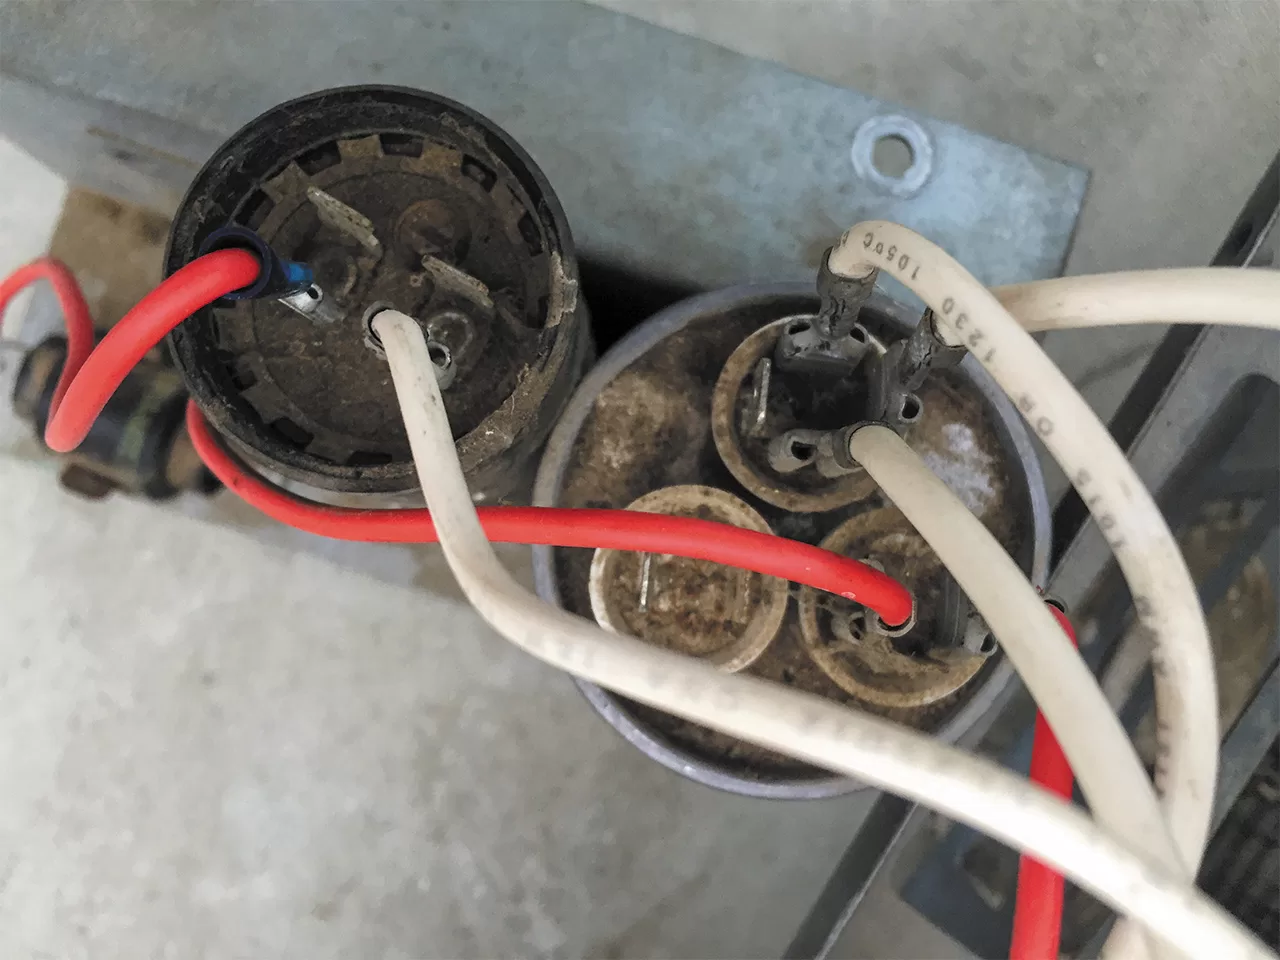
To access the capacitors, go on the roof of the RV (or have someone else do it if you’re not comfortable) and remove the shroud on the offending A/C unit. Locate the power box, which will be a sheet-metal box with a screw-on cover. Ensure the circuit breaker is turned off. Remove the power box cover and you should see a circuit board and one or two capacitors. One capacitor may be hidden under the other one. It is important to discharge the capacitors prior to working on them; otherwise, serious electric shock may occur.
Using a voltmeter, set it to the highest A/C voltage scale and touch the leads to the terminals of the capacitor. This will discharge it. After discharging, disconnect the wires connected to the capacitor. Set the meter to the highest ohm scale and touch the probes to the capacitor terminals. The reading should rapidly move toward zero and slowly return to infinity. Reverse the leads and repeat the procedure. If there is no reading, or a prolonged reading, replace the capacitor. These can be easily sourced online, but it is important to purchase an identically rated capacitor.
The combination run capacitor has three terminals. They are marked “F,” “C,” and “HERM,” which stand for “fan,” “common,” and “compressor.” To check the combination run capacitor, follow the discharge procedures above. Make sure to test from “C” to “F” and from “C” to “HERM.”
Faulty capacitors are the cause of many fan and compressor issues on air-conditioning units. As indicated, always make sure the power is turned off to the A/C unit and that the capacitors are discharged prior to working on them. I generally recommend replacing the capacitors regardless of test results, since they are inexpensive and easy to replace.
Next month I will continue with the other troubleshooting steps if the capacitors do not resolve the issue.
Send your troubleshooting questions to Steve Froese at techtalk@fmca.com. The volume of correspondence may preclude personal replies. Not all responses will apply in every instance. Some situations may require a visual inspection and hands-on testing. If you choose to follow any procedures outlined in this column, first satisfy yourself that neither personal nor product safety will be jeopardized. If you feel uncomfortable about a procedure, stop and make an appointment with an RV service facility.
You may also want to consult the FMCA Forums (https://community.fmca.com) to see whether your question has already been addressed or, if not, to post it.
Recalls
Looking for the latest RV-related recall information? Visit FamilyRVingmag.com for a list of the most recent recalls issued by RV and component manufacturers. Or, to search for recalls, investigations, and complaints by vehicle year, make, model, and VIN, visit www-odi.nhtsa.dot.gov/owners/SearchSafetyIssues. NHTSA’s Vehicle Safety Hotline is (888) 327-4236.